
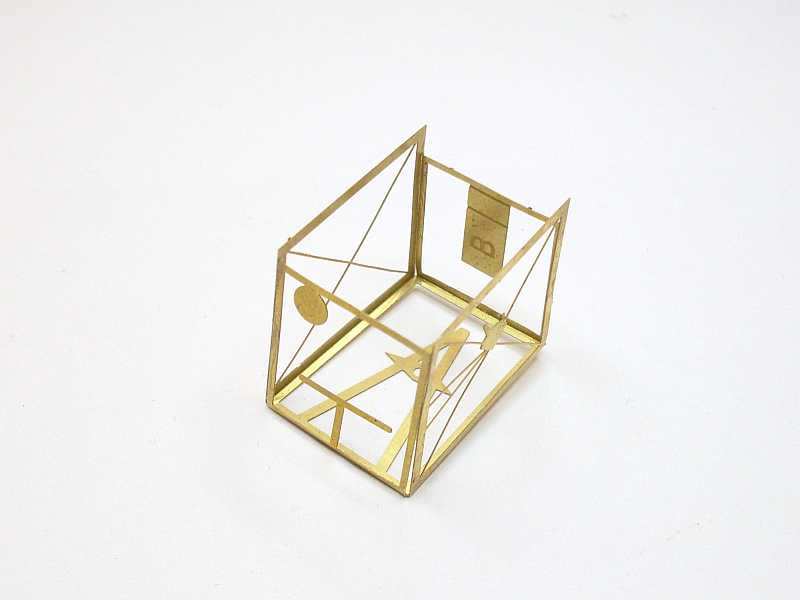
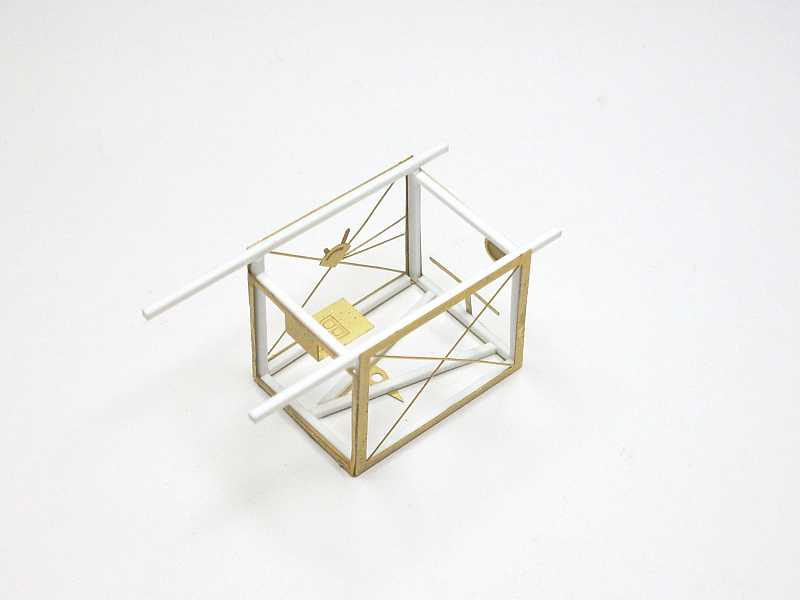
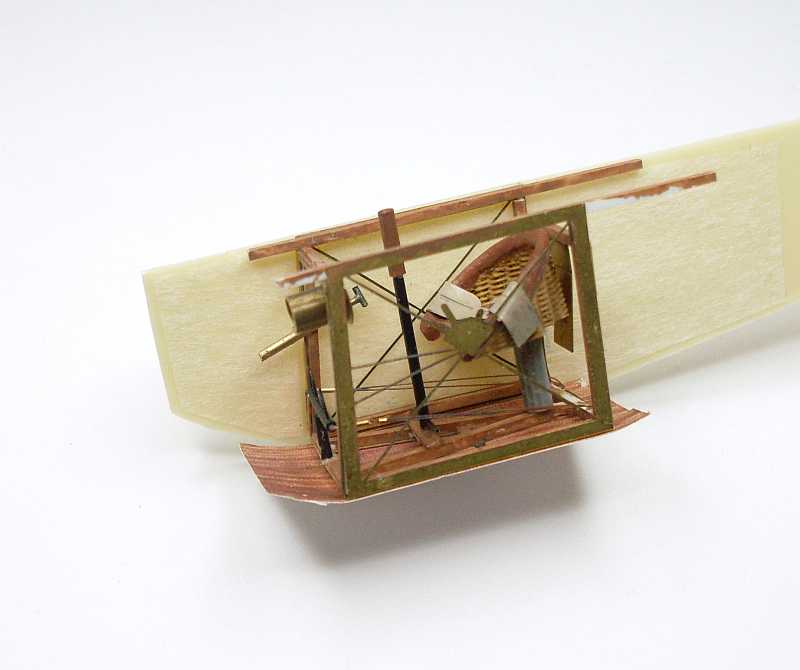
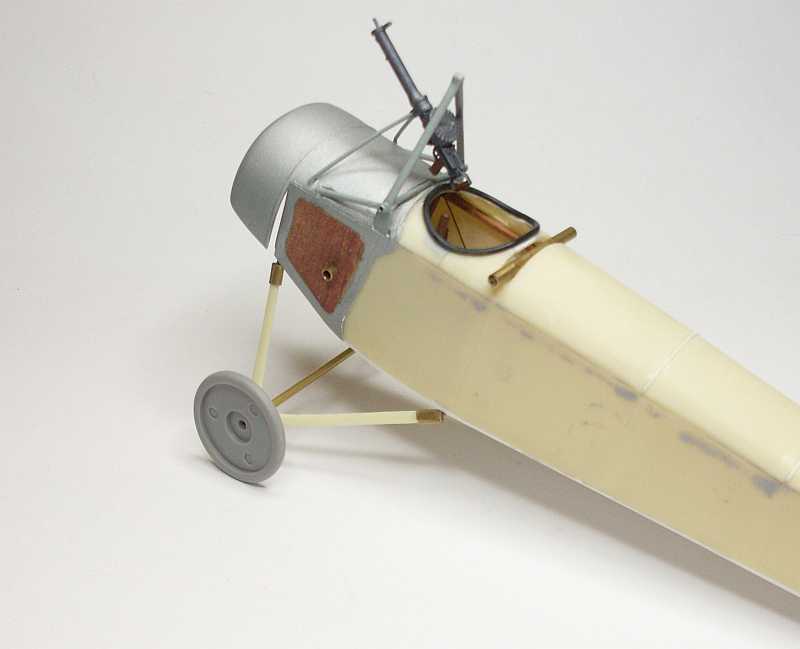
I have started the build by making up the PE cockpit frame. The PE bends very easily but gaps are apparent at the corners, the PE includes the frame bracing wires and the throttle quadrant. To give the frame a more substantial appearance I added 1.0mm square styrene strips to each of the internal corners, I used CA (Super Glue) which bonds the styrene to the PE very well. All the white styrene strips will be painted a wood colour but like most WW1 aircraft once the fuselage is closed up very little of the cockpit will be seen. I will be adding a pressure pump and two instruments one being a compass, these will be scratch built.

The seat supplied with the kit is way too small, I have a few seated pilot figures and none of them would fit the seat. I had a damage wicker seat from another kit so I modified it and added a seat pad, once painted it looks okay. The new seat fits the cockpit frame very well, I will be adding seat belts to the seat before it is fitted.
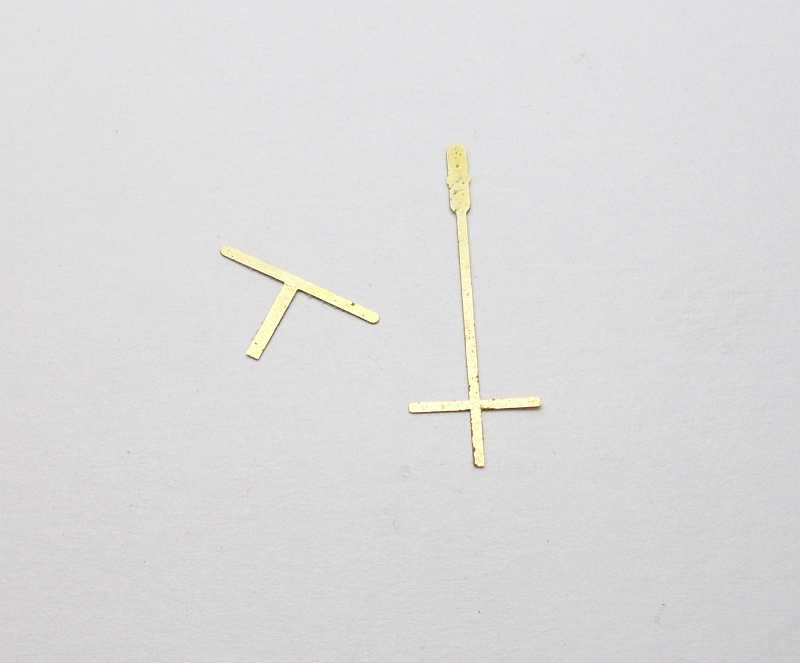
The rudder bar and the control column supplied with the kit are PE items, they are very basic so I scratch built new items using 1.0mm round styrene stock, the foot loops on the rudder bar are made from 0.4mm brass wire. The instrument is made from brass tube with an instrument decal fitted inside the tube, a bezel has been fitted to the brass tube.
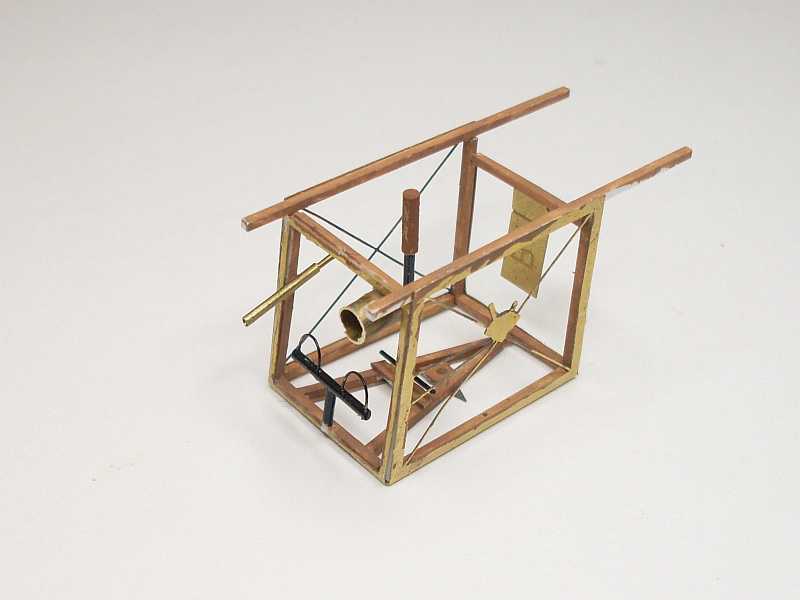
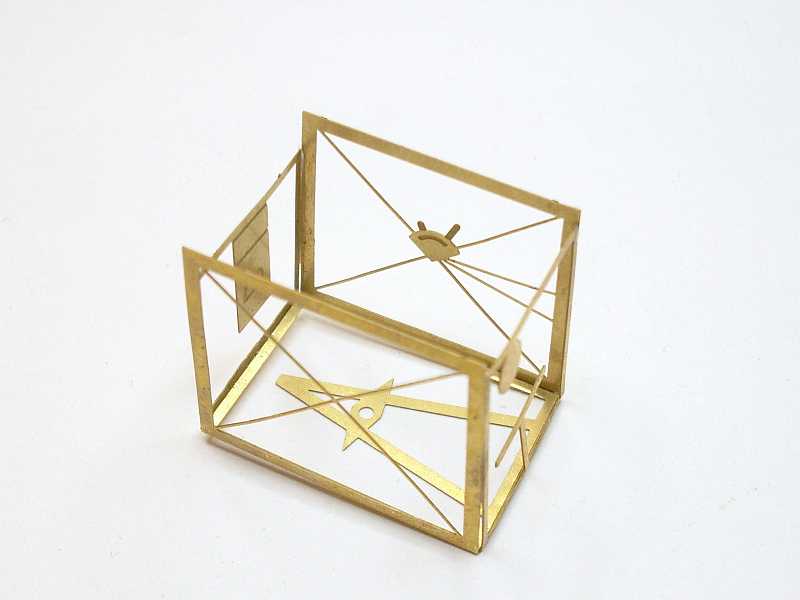
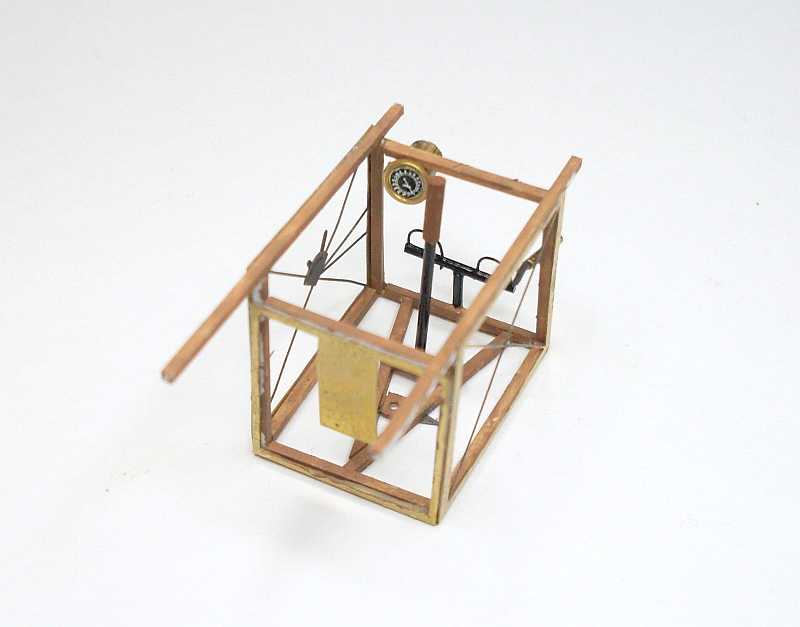
The frame has been painted with Humbrol 118, U.S. Tan, the control column and rubber bar have been painted with Gunze Black while the control column hand grip is done with Humbrol 62 Leather, the instrument is left as natural brass but a drop of Humbrol gloss clear has been placed over the instrument face to simulate the glass.
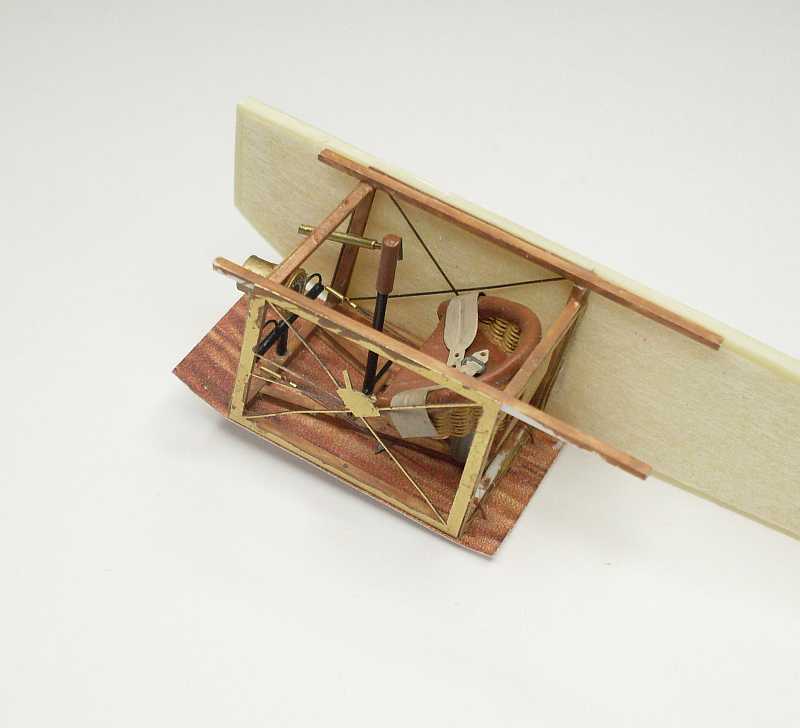
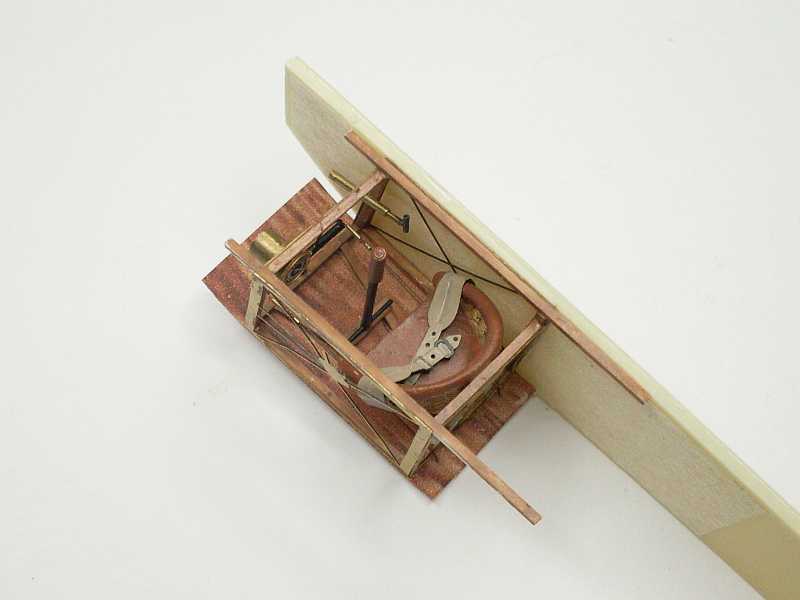
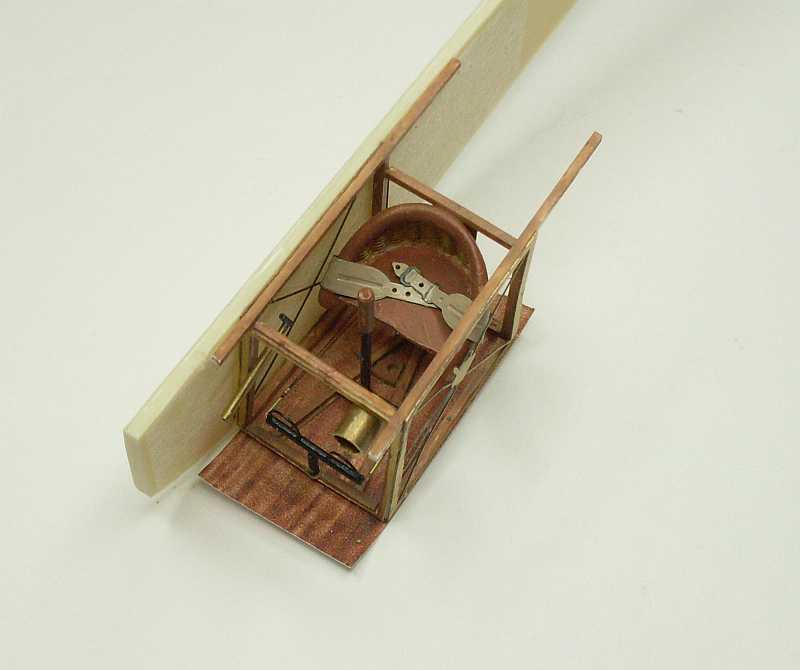
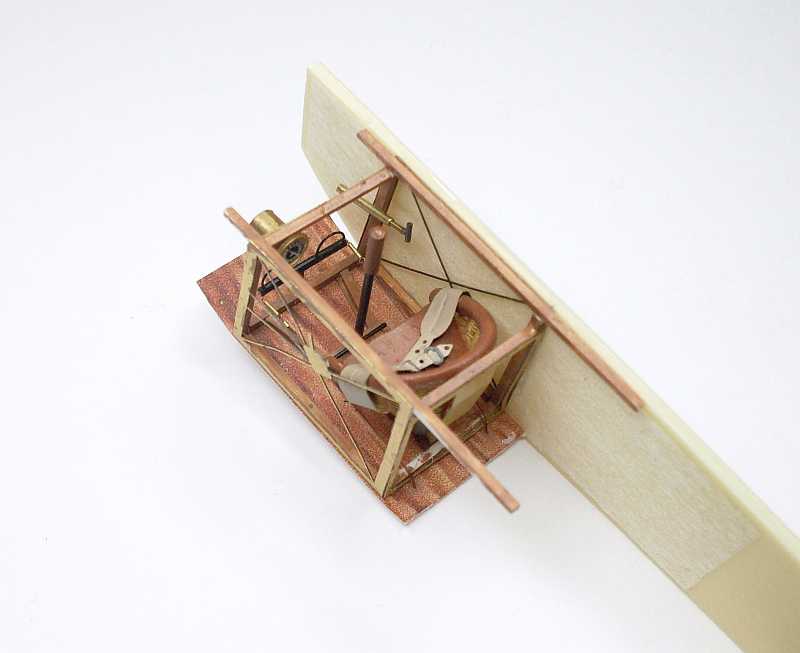
The seat is now fitted to the frame, I also fitted the kit supplied PE seat belt. The cockpit frame is attached to the fuselage side with CA. I also added control cables from the rudder bar, this is done using 0.12mm monofilament and small 0.5mm brass tube connectors, CA holds it all together. The floor is just a timber grain printed out on plain paper with my ink jet printer, it was glued to the bottom of the cockpit frame with CA. The entire cockpit assembly has been sprayed with a 50/50 mix of Humbrol Gloss and Humbrol Matt clear coats

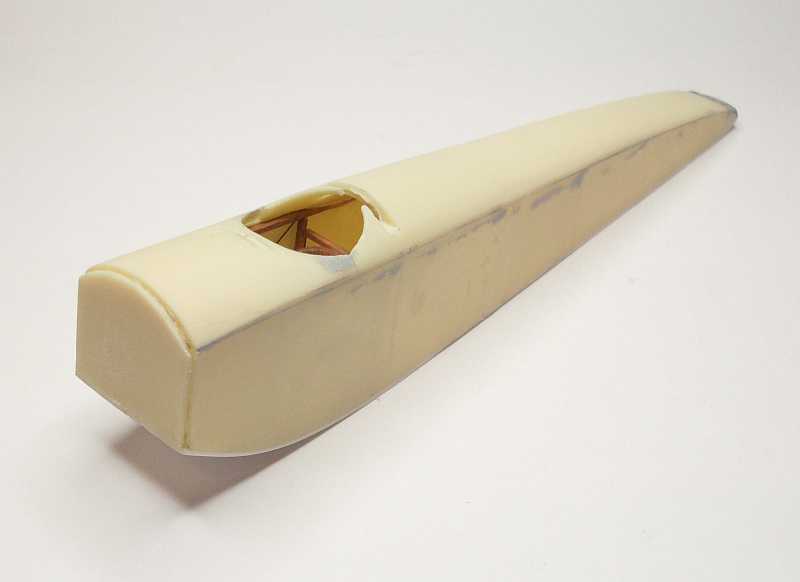
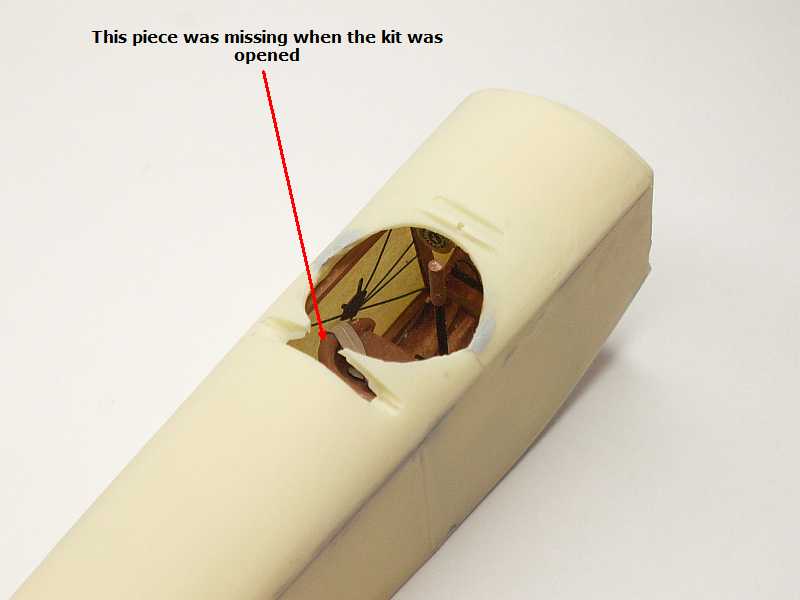
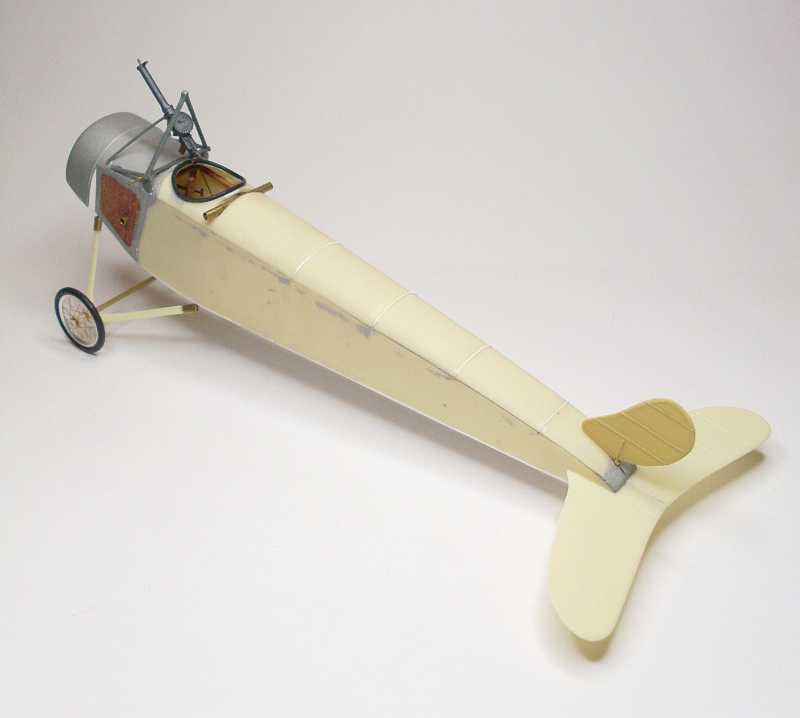
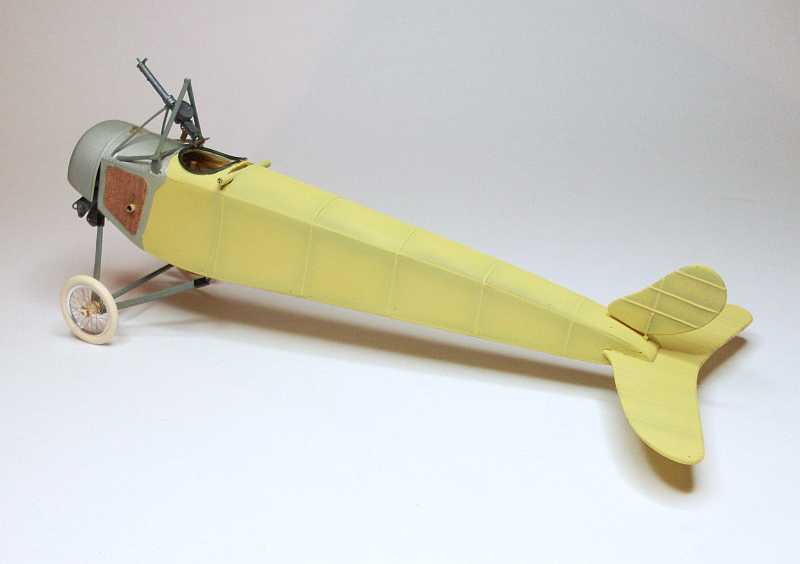
The fuselage has now been closed up. The fuselage is made up of five pieces, the two sides, the bottom and a two piece top. The top section when compared to the sides is 5.0mm short in length, also the fuselage frame raised lines do not line up with the raised lines on the sides. The bottom is totally unusable, it is paper thin the entire length on one side but 3.5mm thick the entire length on the other side, I have discarded this item and replaced it with styrene sheet. Also, a section behind the cockpit opening is missing, this will be replaced with styrene. Only a small amount of filler was needed to fill a few small gaps where the fuselage fitted together.
I used a length of 0.9mm electrical cable plastic tube to simulate the cockpit padding, I used CA to hold it in place. To make the tube more stable I left the wires inside the plastic tube, this gave it more rigidity which made it easier to handle.
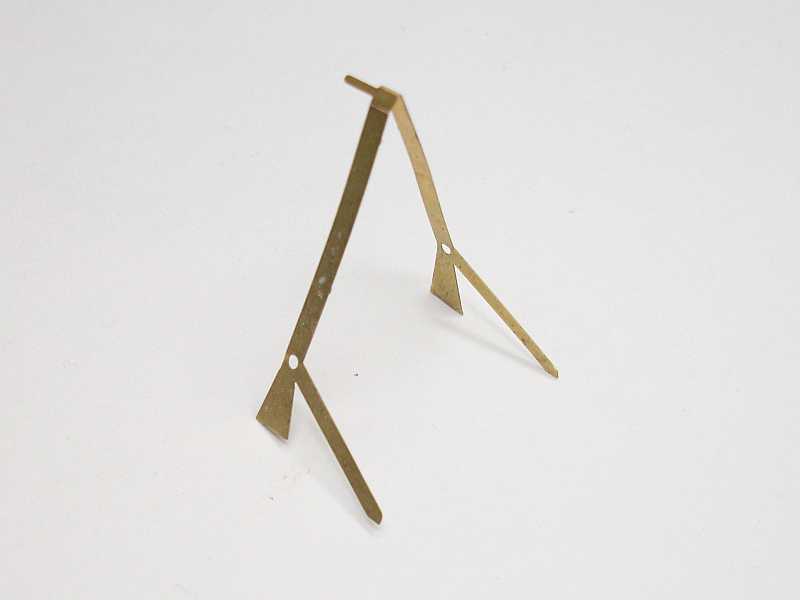
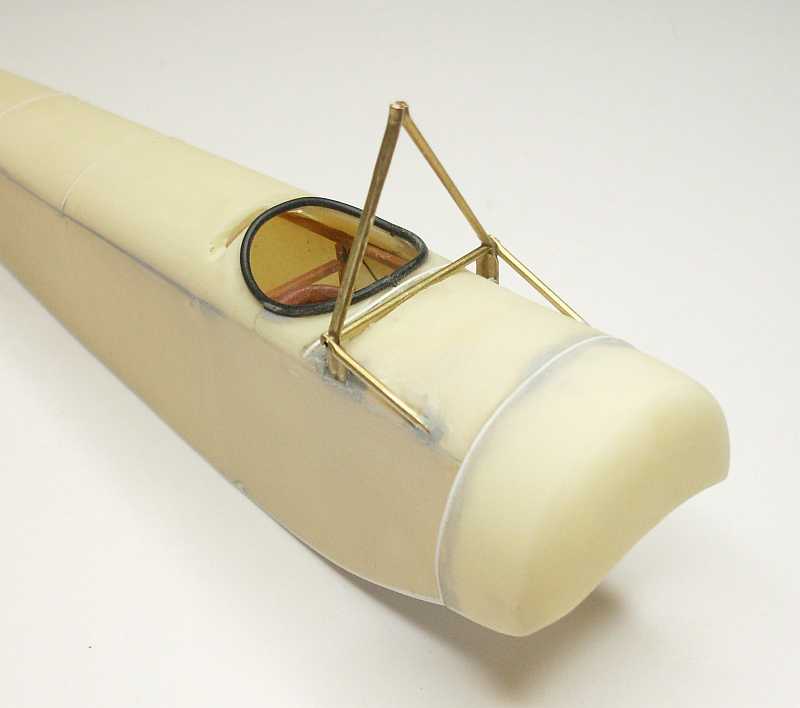
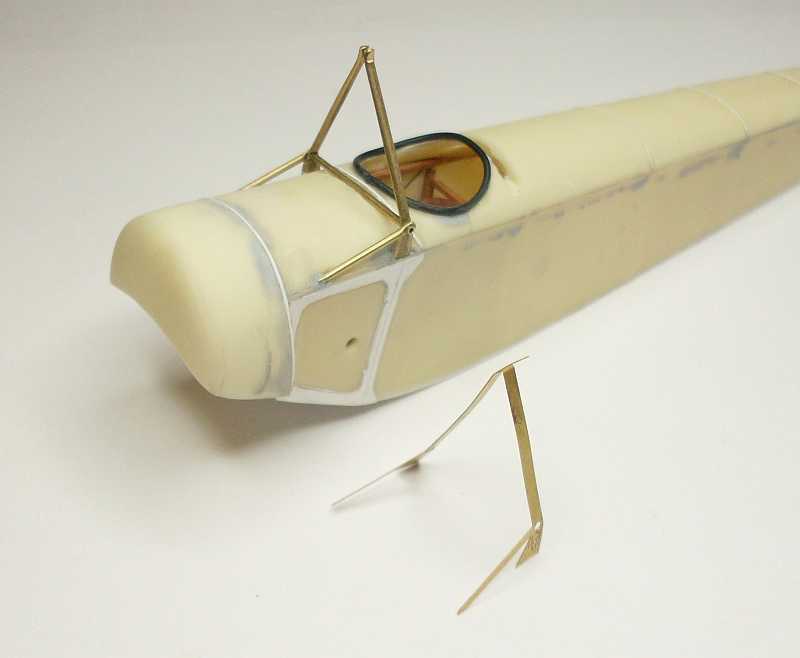
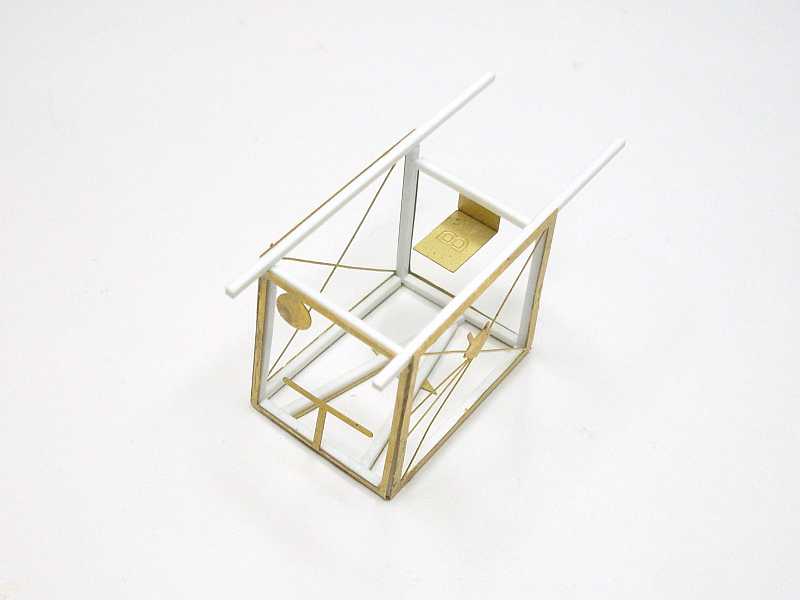
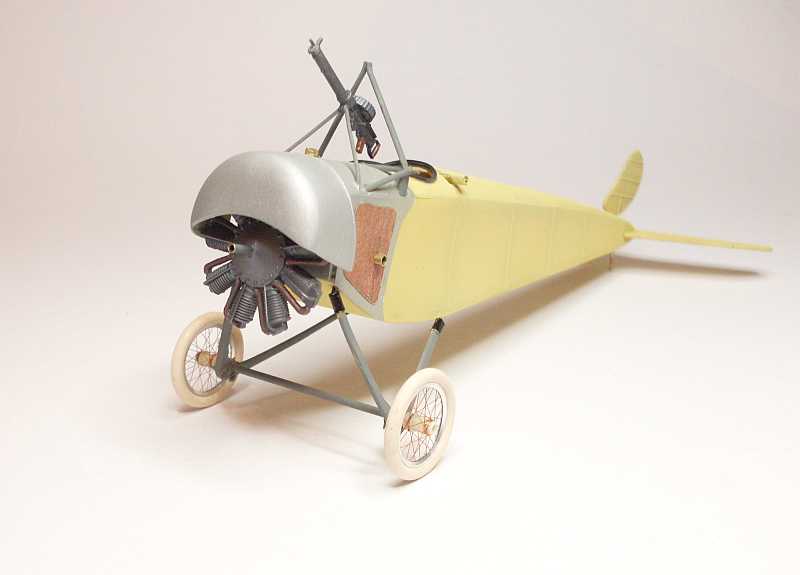
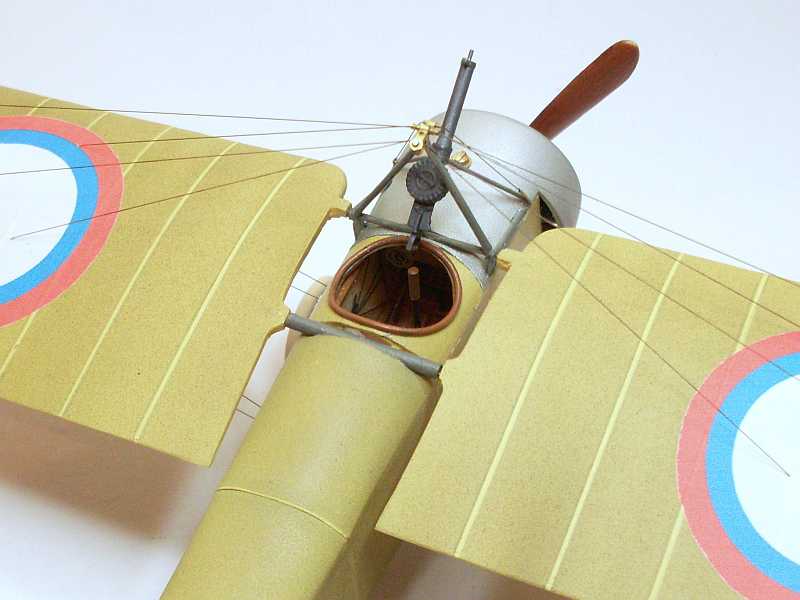
The top mast for the wing rigging is supplied as a PE piece, it is very two dimensional and weak so I decided to replace it with more substantial and better looking brass tube, I used 1.0mm tube. I cut slots into the top of the fuselage to take the flattened tube.
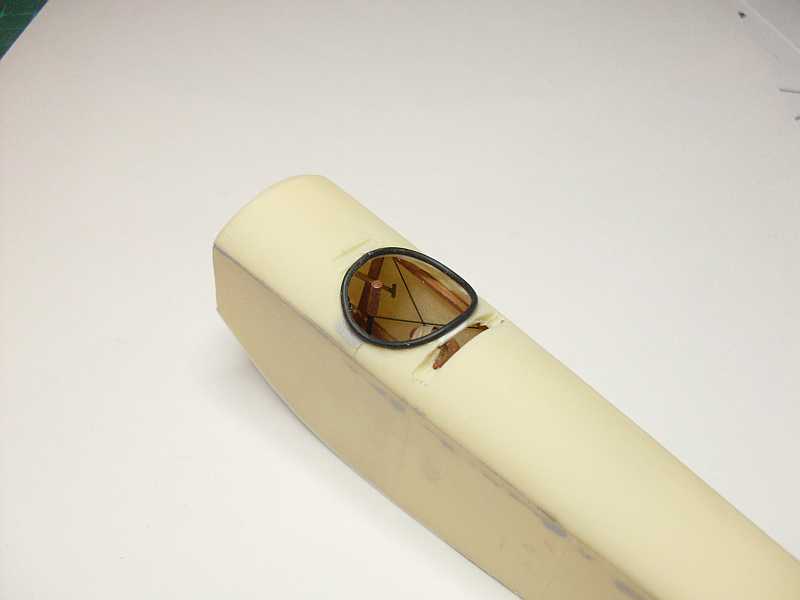
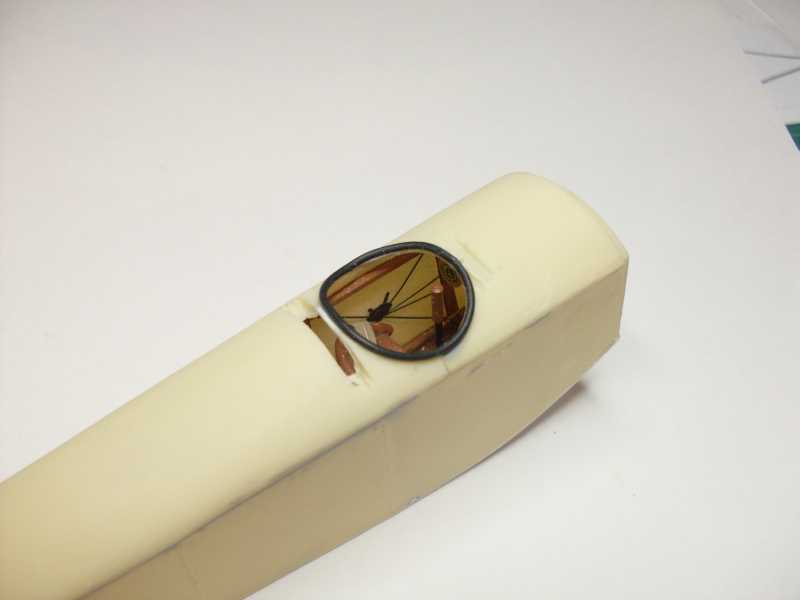
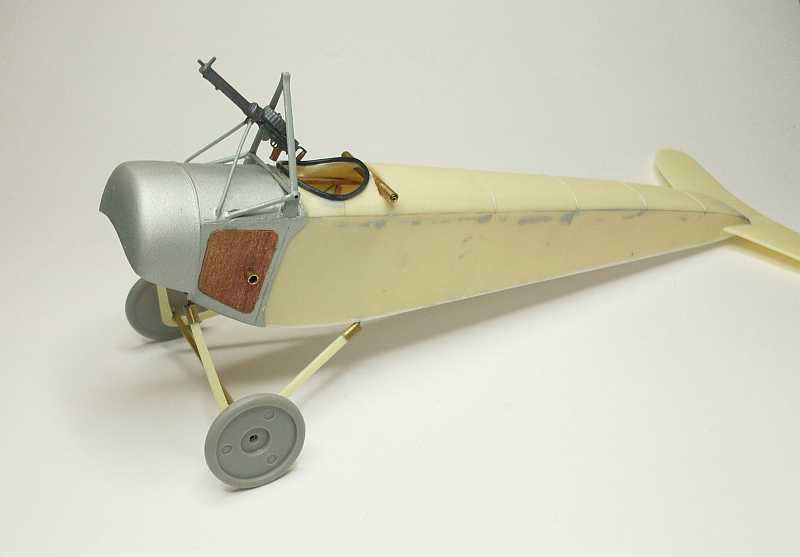
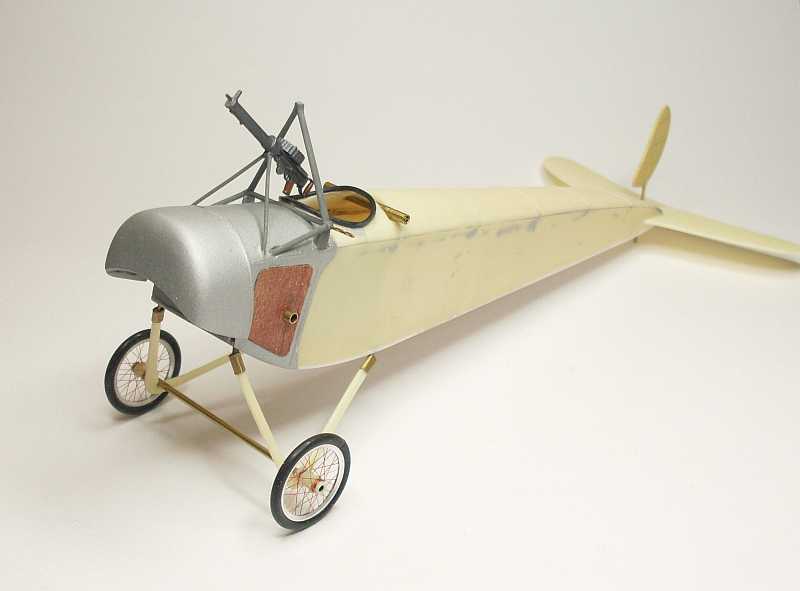
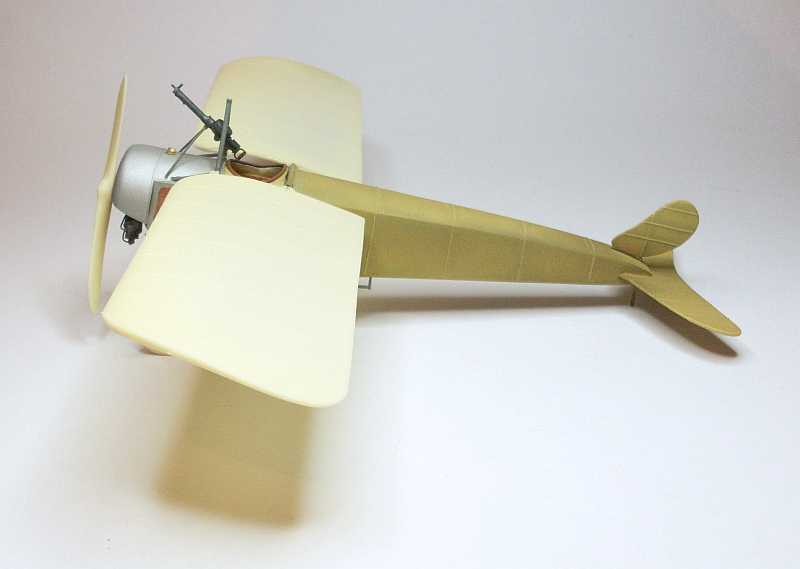
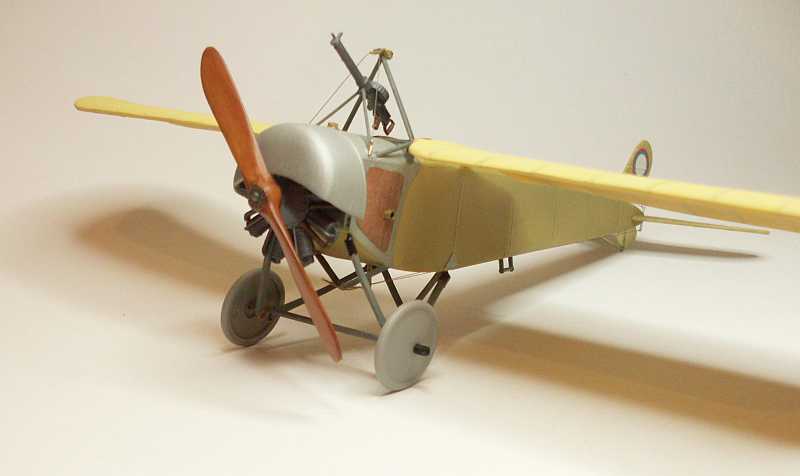
The side access panel is supplied as a PE piece, it is okay except that the air intake hole is too high, this will be filled once the panel is fixed in place. The panel frame is made from 0.15mm styrene sheet and super glued onto the side of the fuselage. I also fitted the engine cowl, it fitted very well with only a little filler and sanding required, the engine is still easy to place in position.

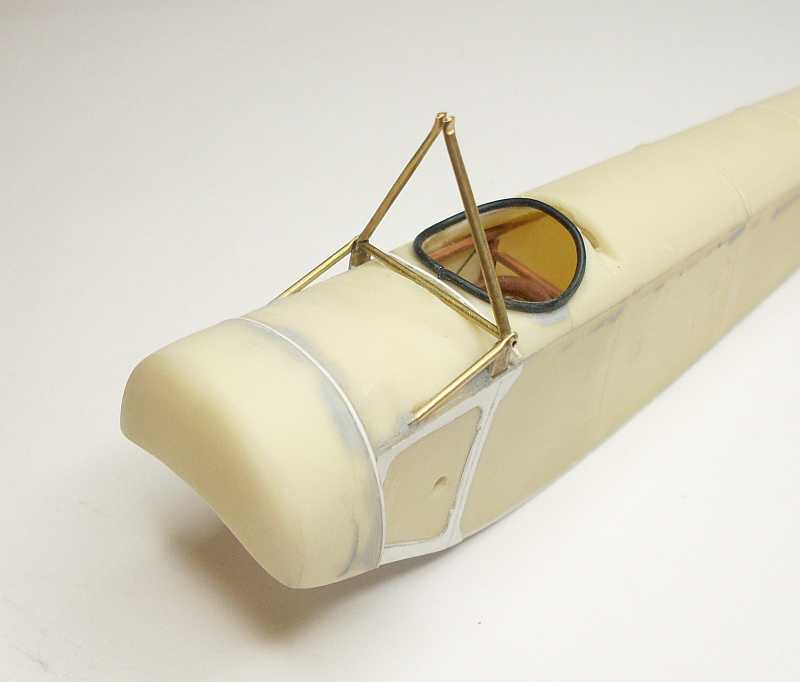
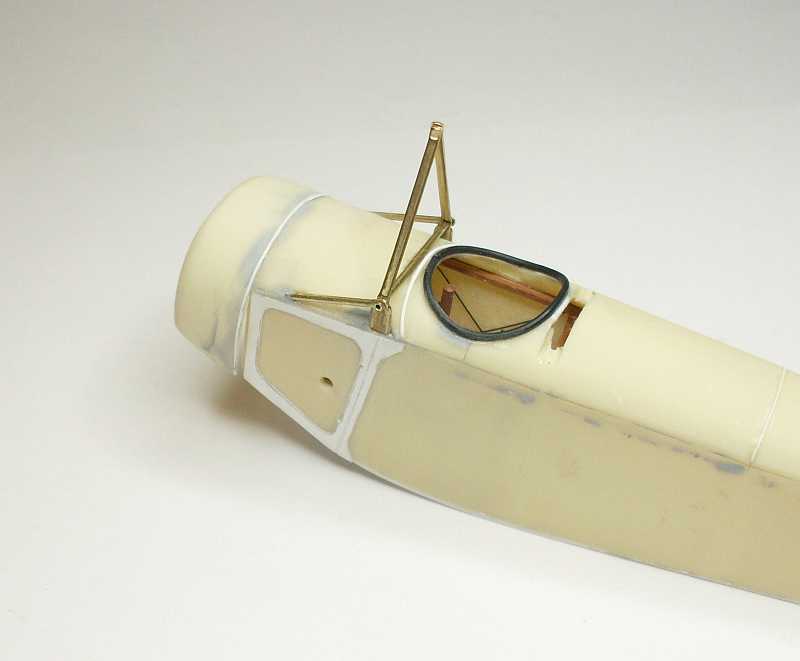
As I mentioned earlier, the top section of the fuselage was 5.0mm short compared to the sides, so this has been filled with filler and sanded to shape. Because of the misalignment the fuselage raised frame lines had to be sanded off, I replaced these with styrene strips 0.13mm thick and cut to 0.4mm in width, these were glued to the top of the fuselage to line up with the side raised panel lines.
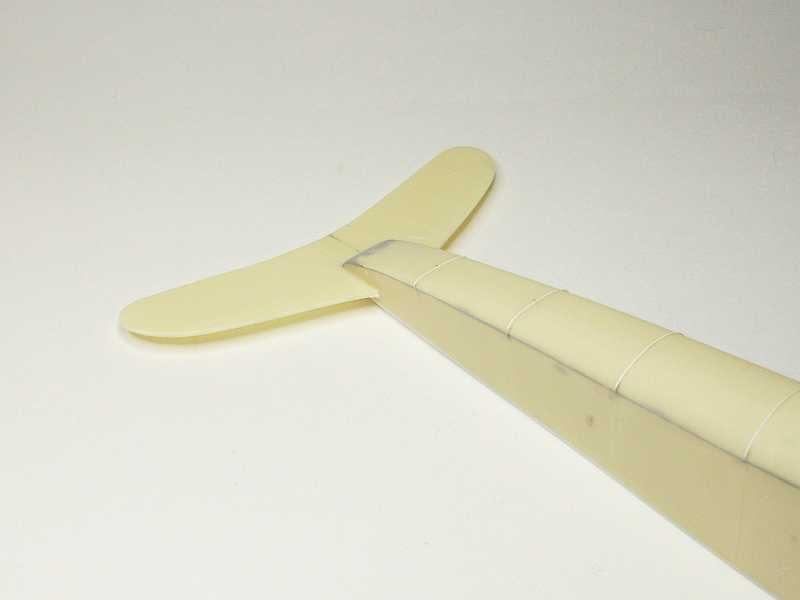
The tail plane fitted quite easily, it needed a little sanding to open the gap to allow it to slide over the fuselage but once in position it was a simple matter pf running a bead of super glue around all the mating surfaces.
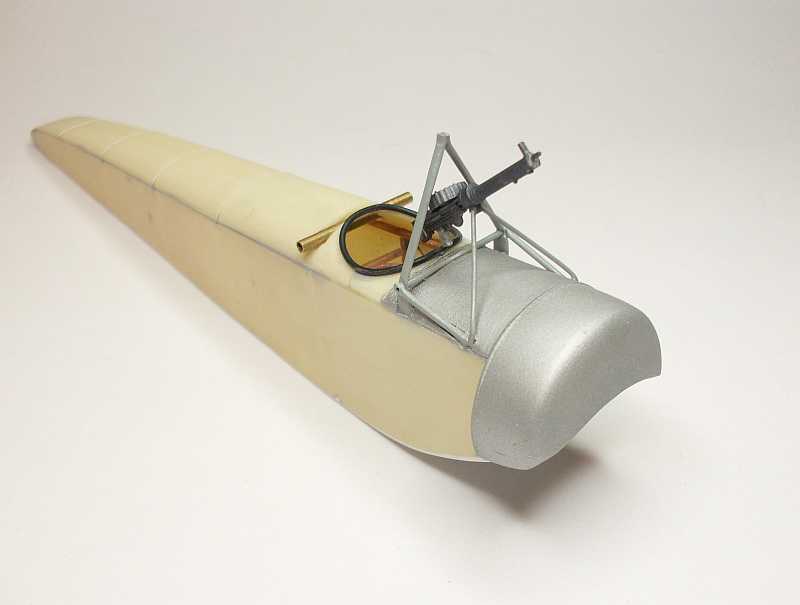
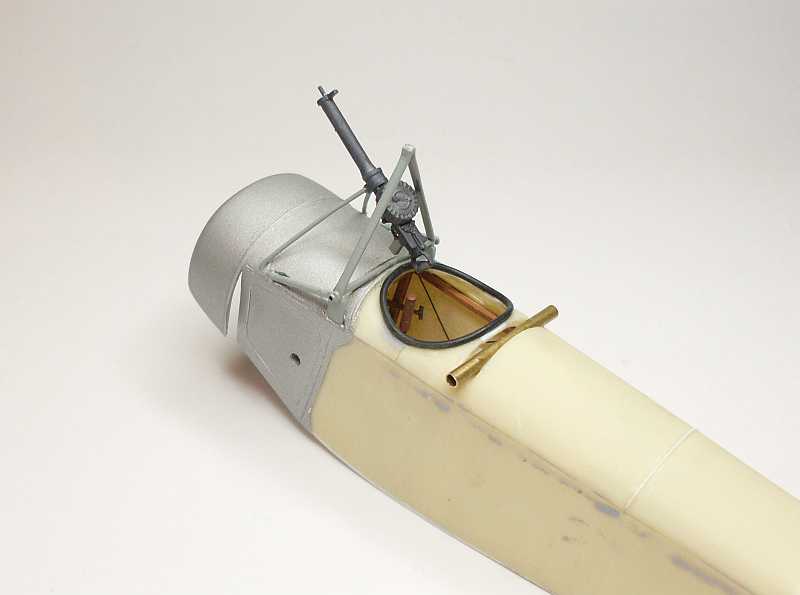
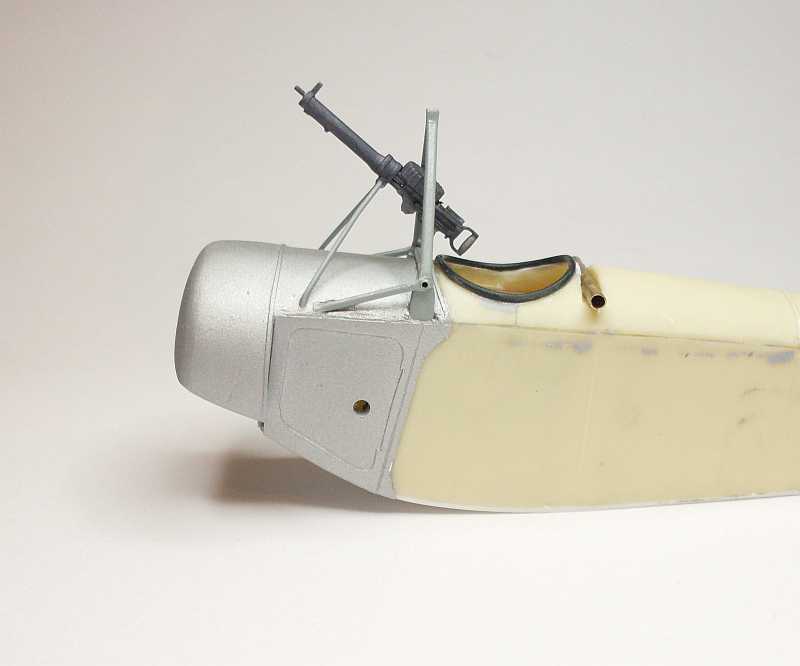
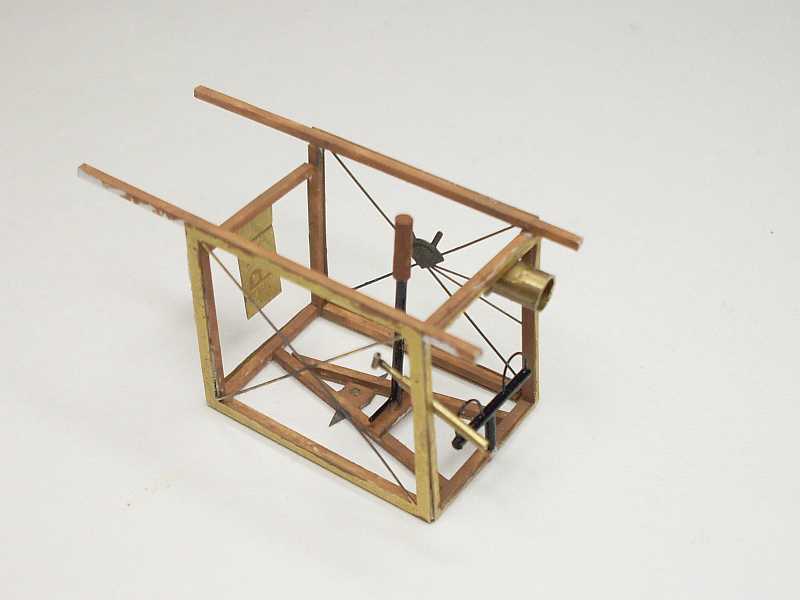
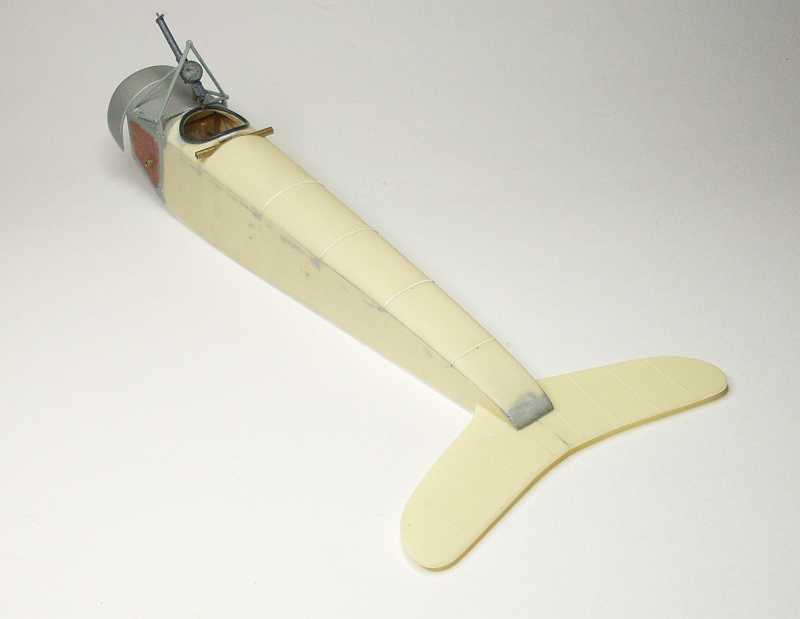
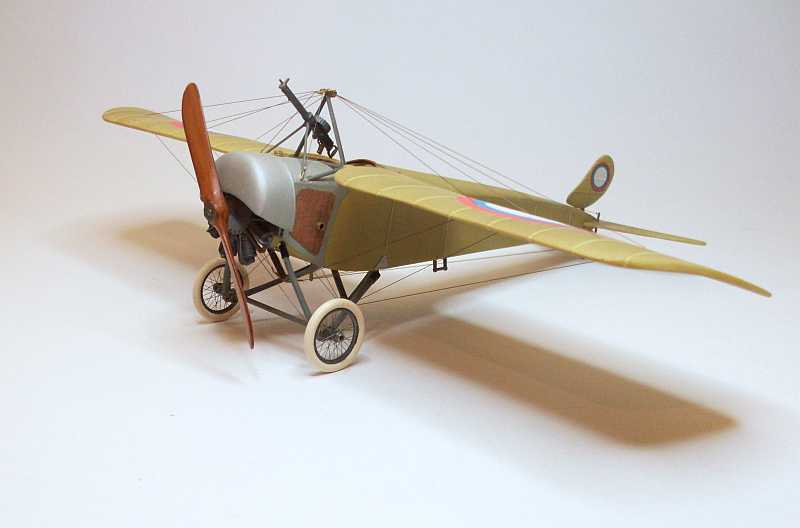
The forward section has been painted with Humbrol 56 Aluminium, the mast and gun support have been painted with Humbrol 167 while the machine gun was painted with Mr Metal Color 212 Iron. This aeroplane did not have a synchronized machine gun so the gun was fixed in a position to fire over the arc of the propeller.
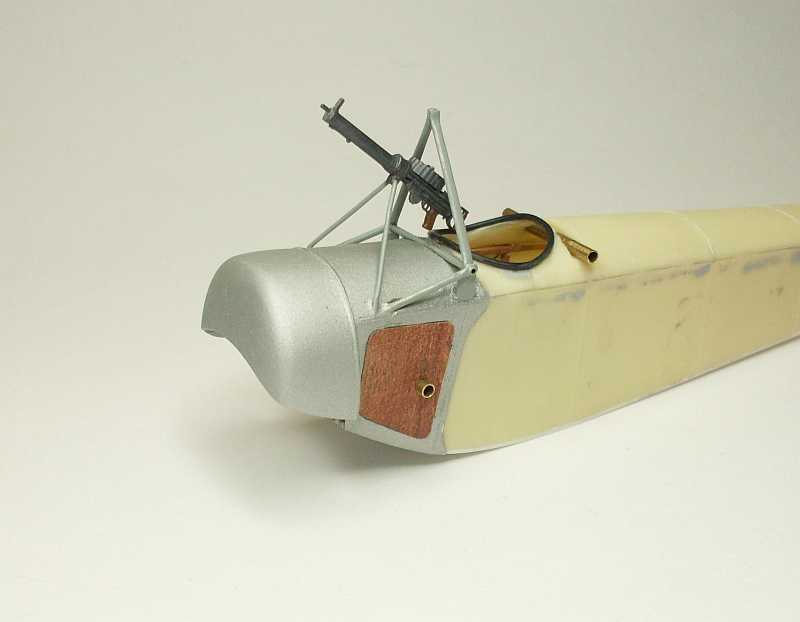
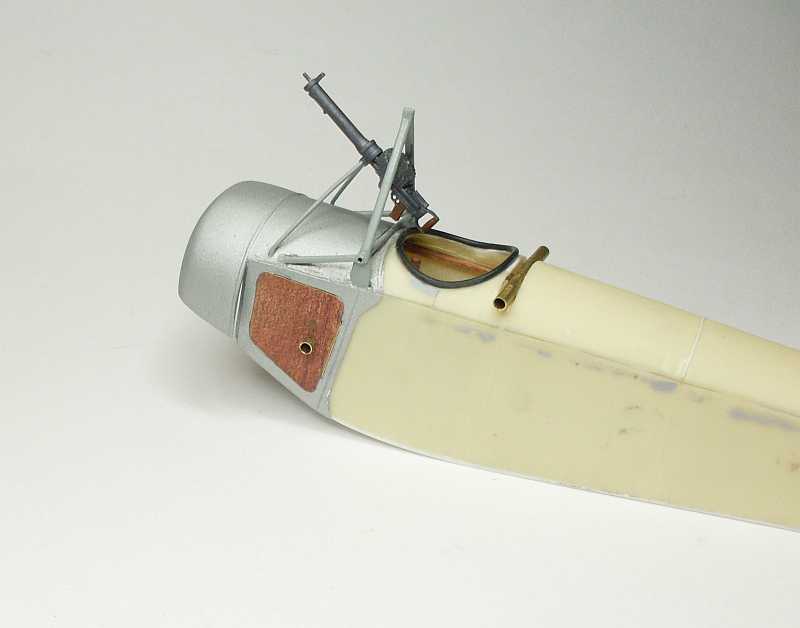
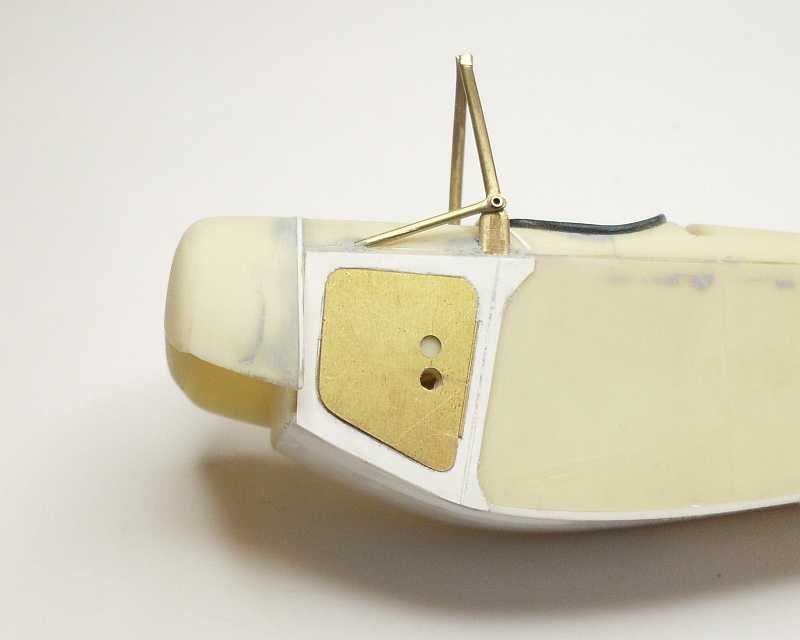
The timber inspection access panel has been added, the panel is a piece of Pe and the wood effect is some wood grain printed from my computer then glued to the panel, once in position it was given a coat of clear which darkens the colour a little. The engine intake pipe is a short length of 2.0mm brass tube.
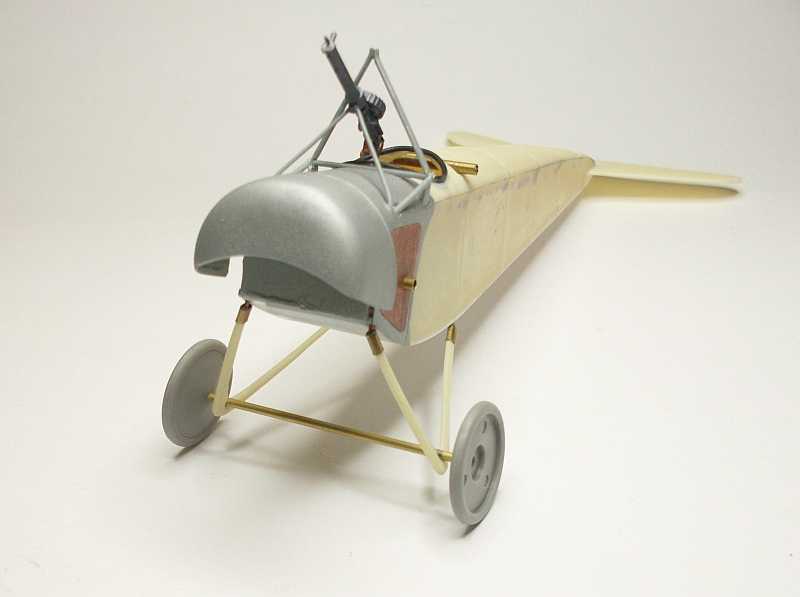
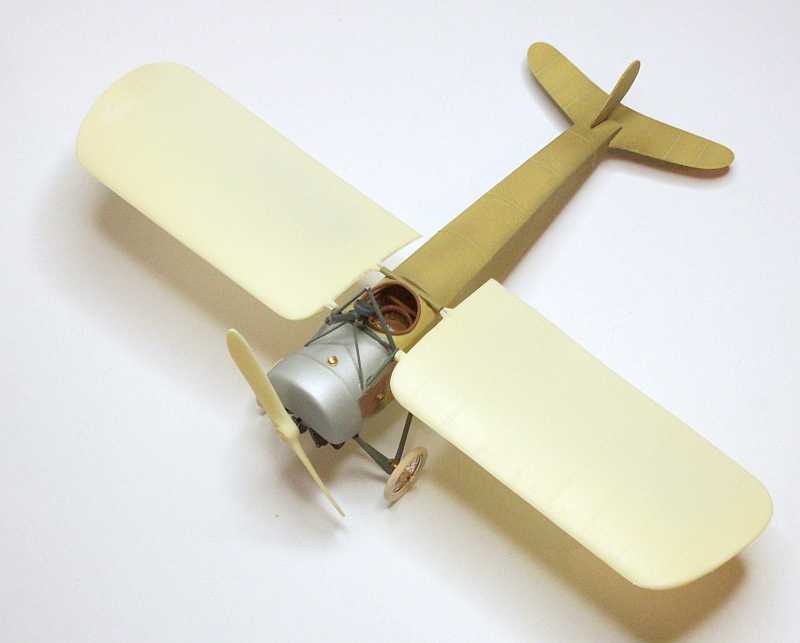
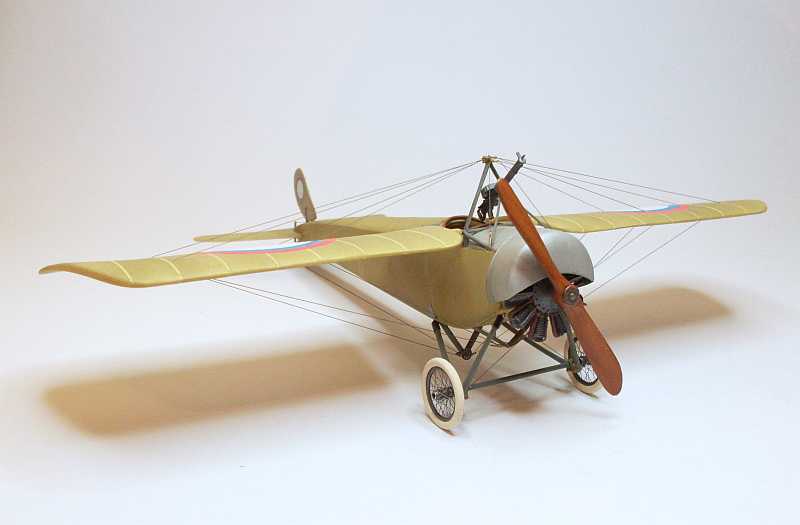
I used the kit supplied resin undercarriage legs but fitted brass tube to the ends of each leg. I then drilled a 0.7mm hole into the end of each leg and fitted lengths of 0.7mm copper wire into the holes, these were fixed with CA. I then drilled 0.7mm holes into the bottom of the fuselage, I also bent the copper wire so the fitment into the fuselage was a straight fit, CA was again used to hold the undercarriage in place. A length of 1.4mm brass tubes forms the axle.
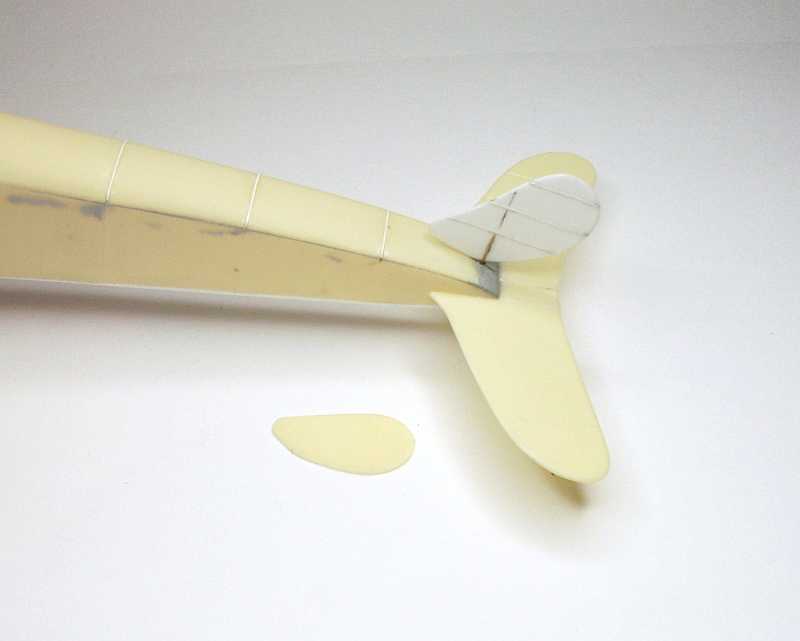
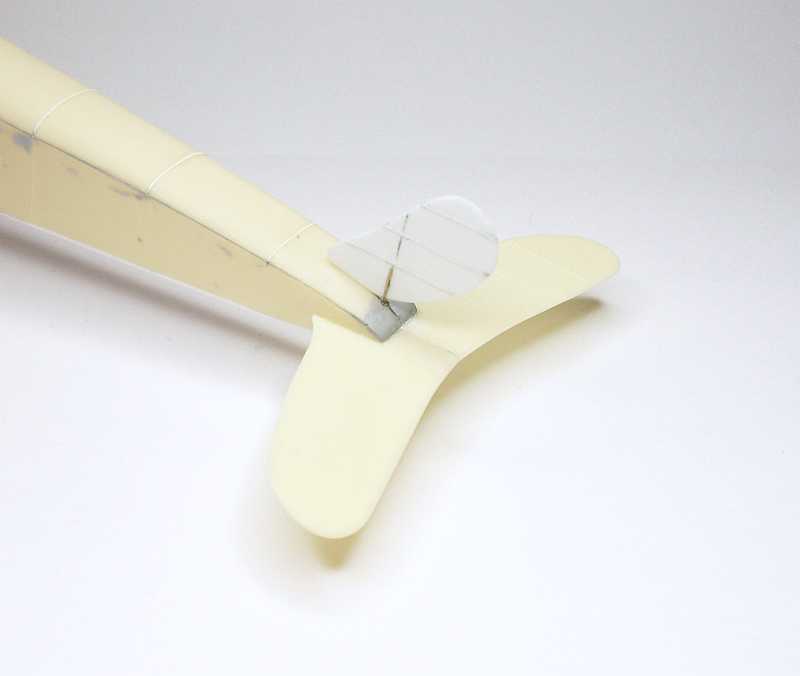
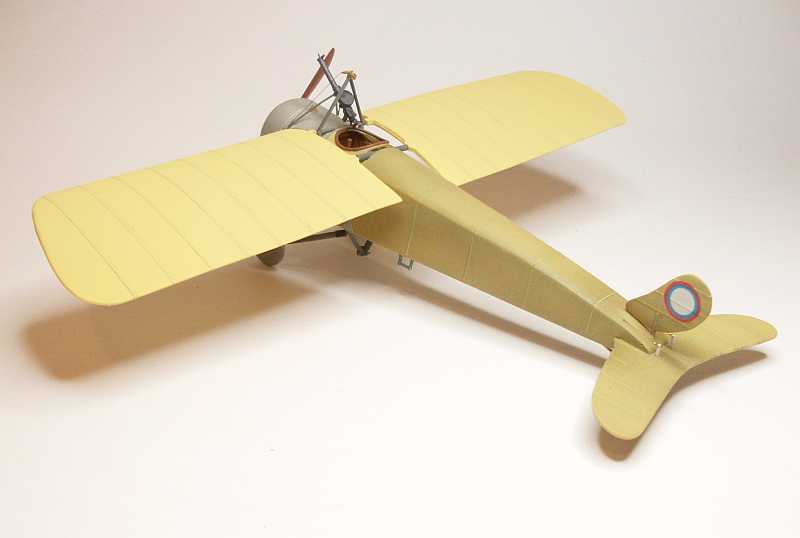
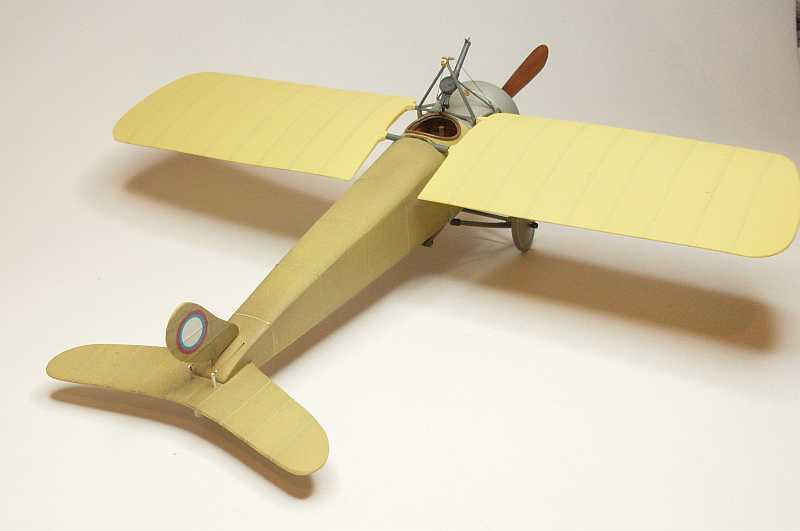
The fin/rudder supplied with the kit was way too small, so I made a new one from 0.75mm styrene sheet. I added the rib lines using thin strips of 0.13mm styrene. It’s unusual that Omega supply a scale plan with the kit but the parts they supply don’t match the plan.

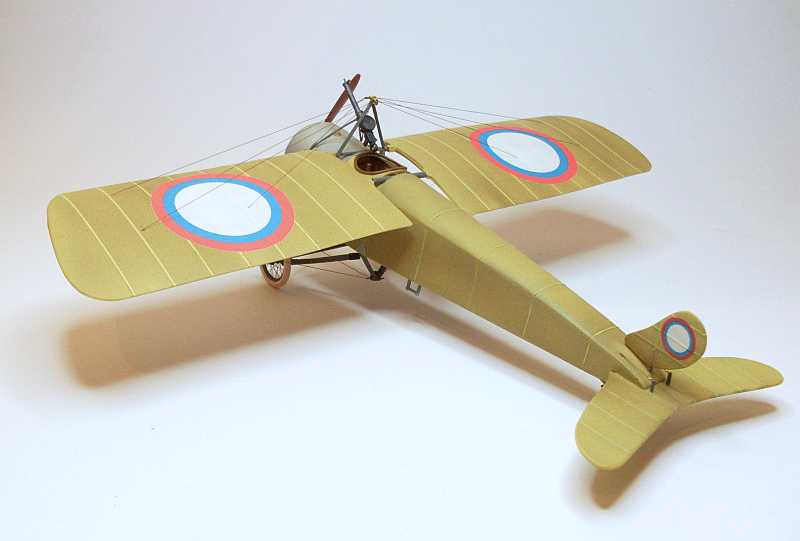
The rudder has been painted in the finished colour, still need to have the decals applied. The top rigging mast is also painted in the finished colour, the spoke wheels are from John Vojteck at Scale Spokes, they will need to be painted.
I used 0.5mm masking tape to mask off the fuselage frames for my pre-
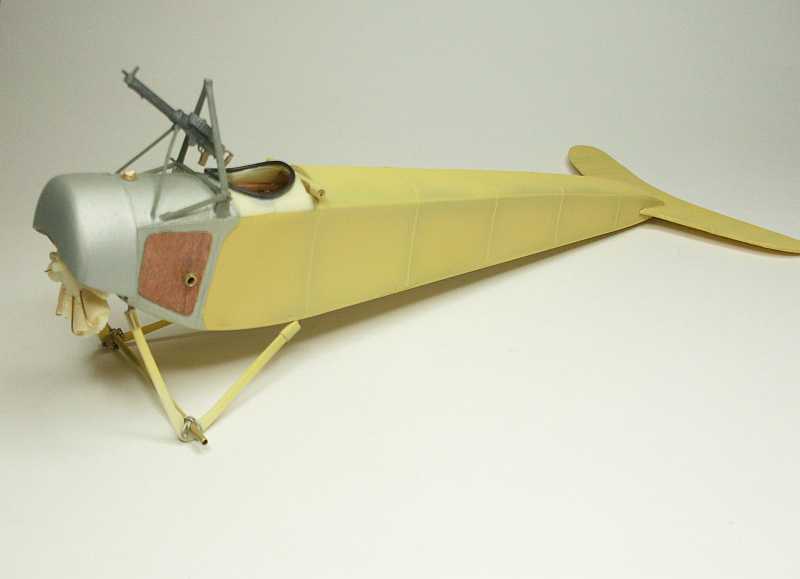

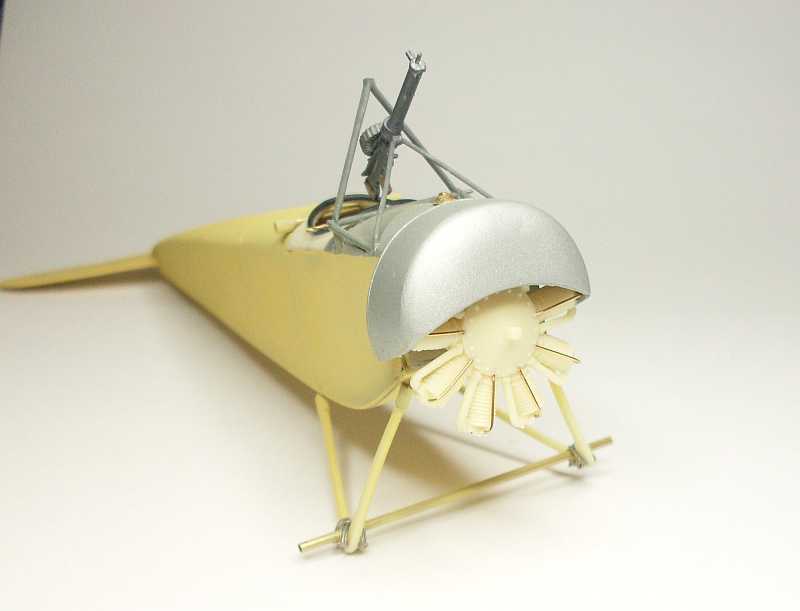
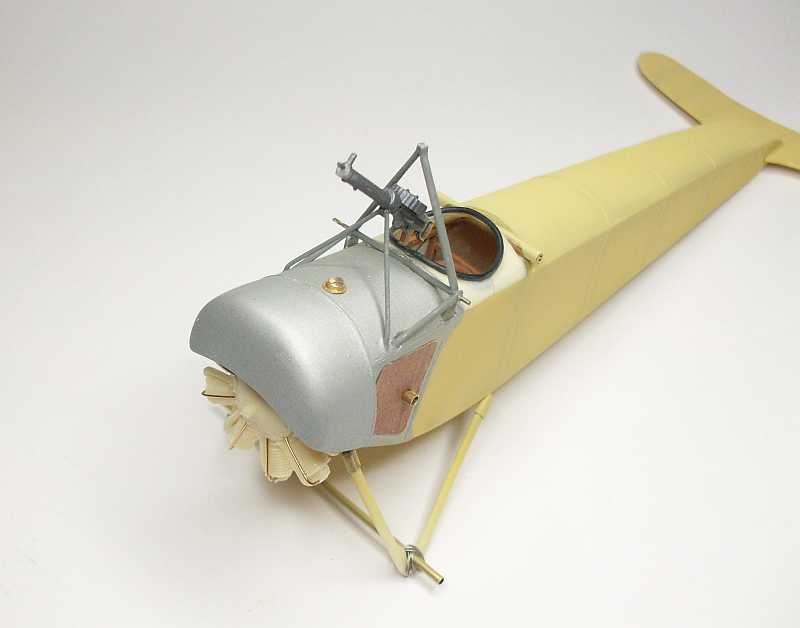
I have decided to use the kit supplied engine, it is fairly basic and lacks a lot of detail but not a great deal of this engine will be seen. I used the intake manifolds supplied and added 0.4mm copper wire for the push rods. I also added a fuel filler cap and pipe to the top of the fuselage.
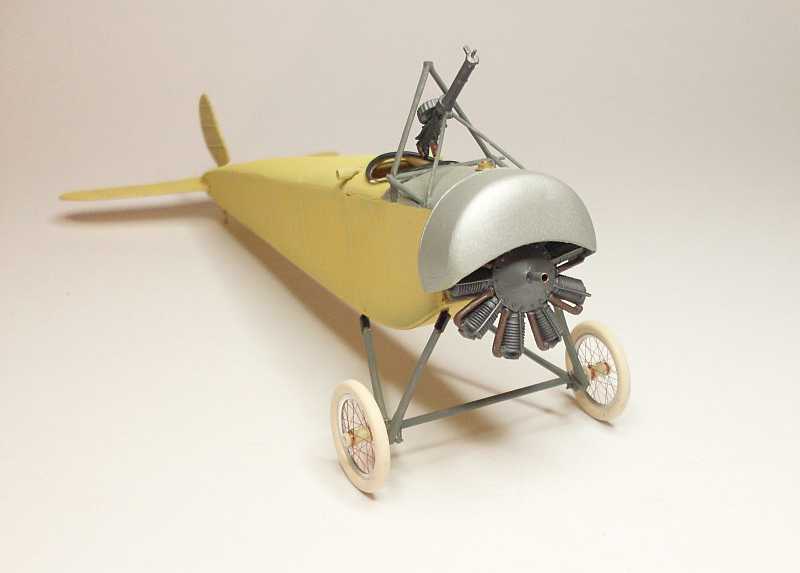
The engine painted up okay, I used Humbrol Polished Steel, after it had dries I gave it a light buff. I had to replace the propeller shaft, the one moulded with the engine was not long enough to protrude past the engine cowl. The engine is now fixed in position.
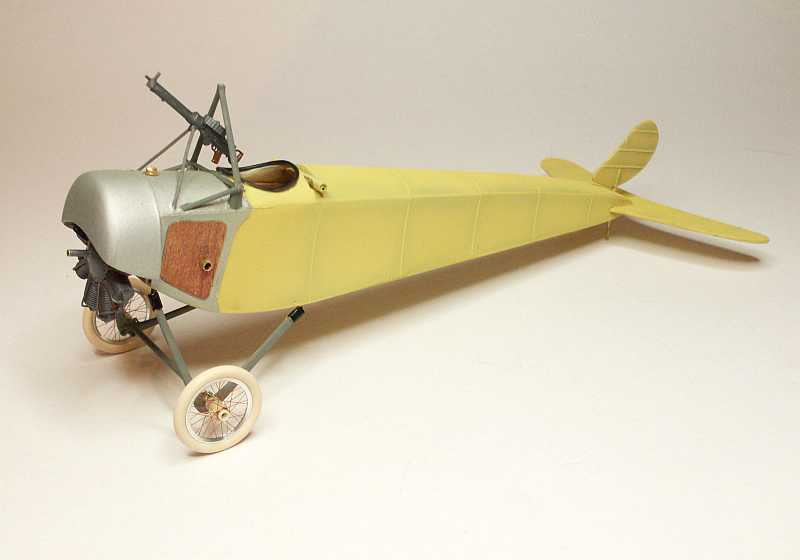
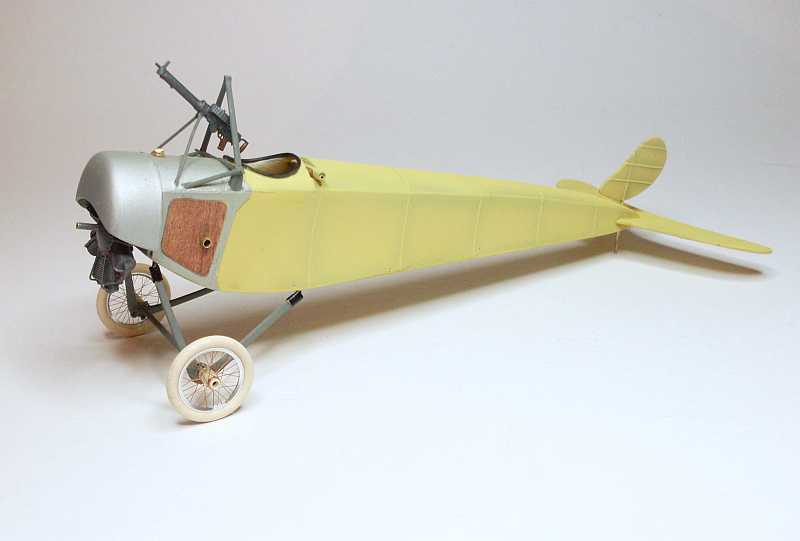
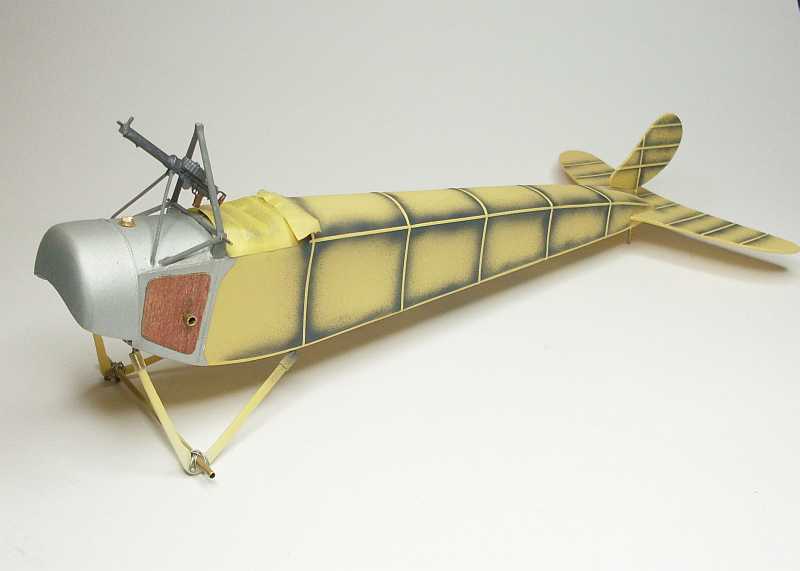
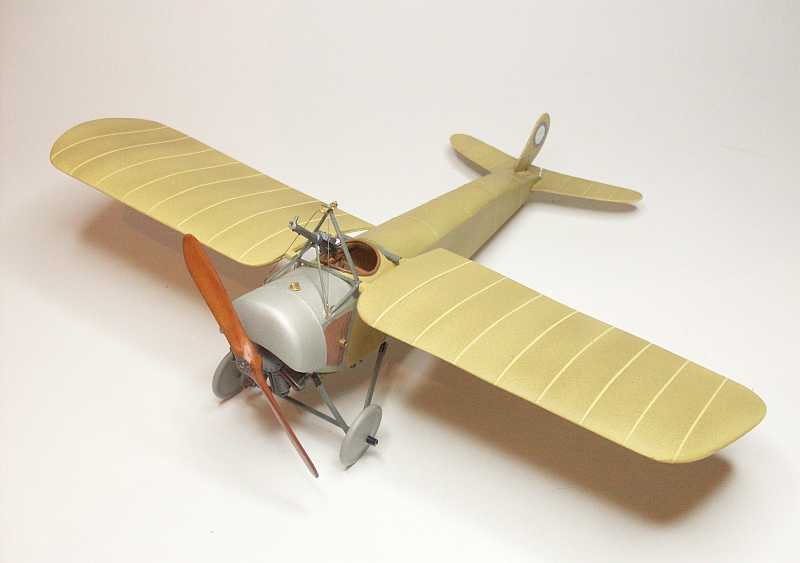
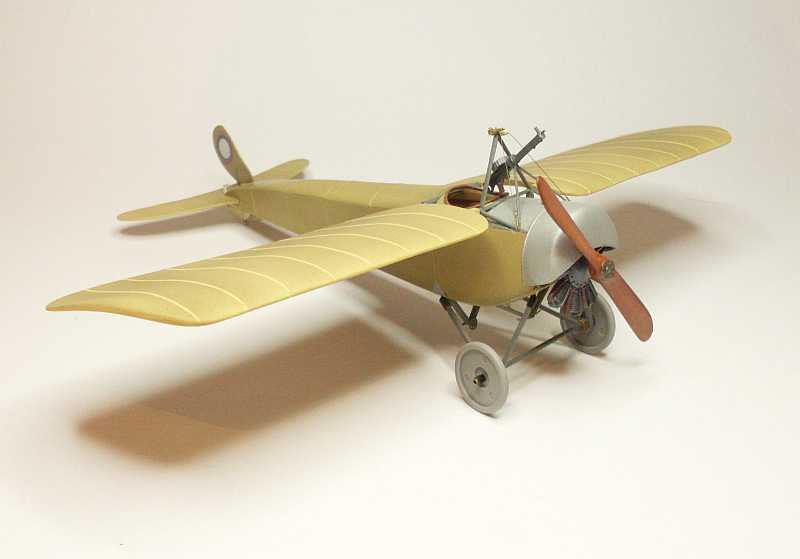
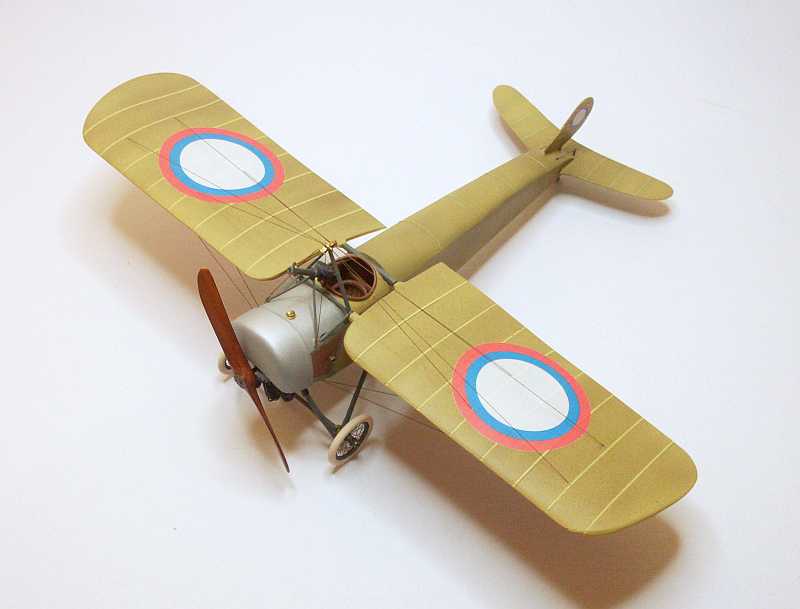
The shading on the fuselage is faintly visible which is how I intended it to look, the rudder will be toned down a little. I decided to use the lighter coloured tyres for the wheels, this is more in keeping with original photos I have seen of this aircraft, the wheels are supplied with black, white and resin tyres.

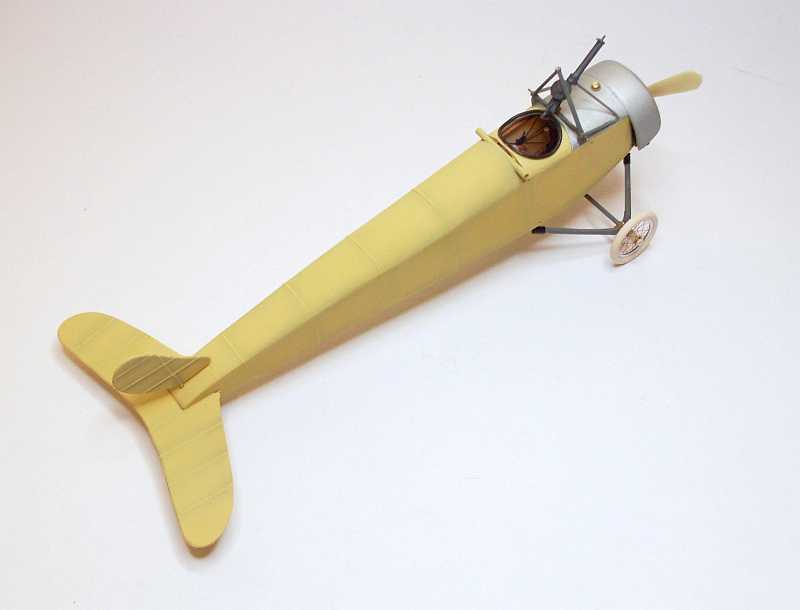
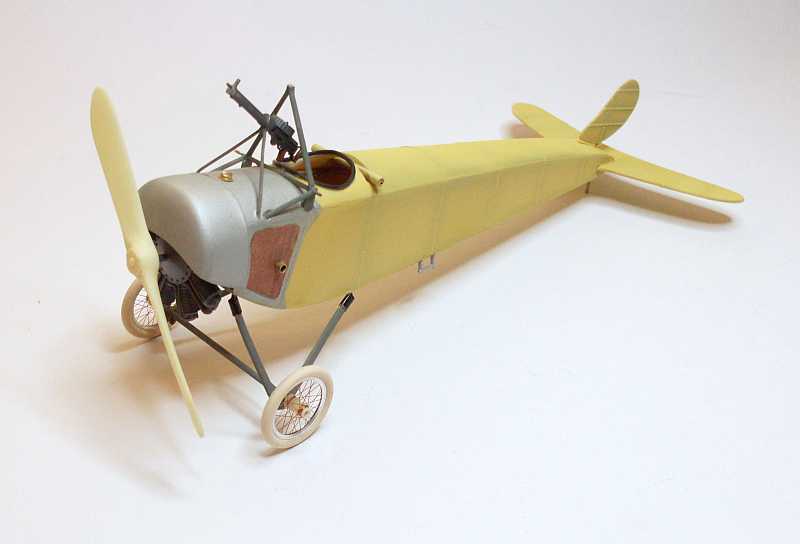

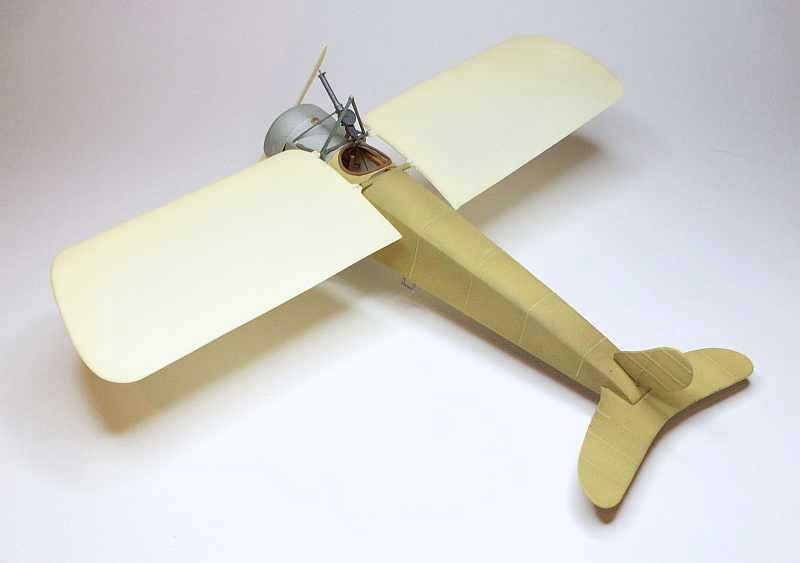
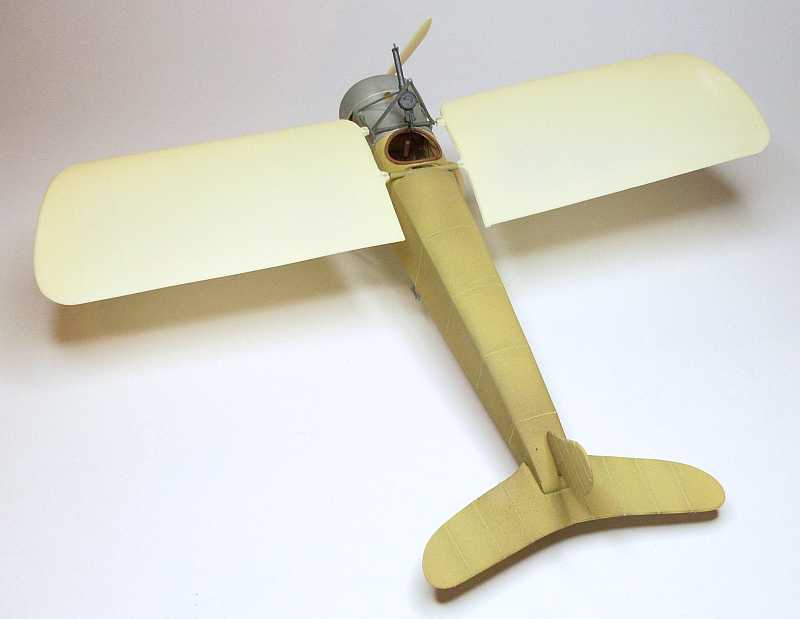
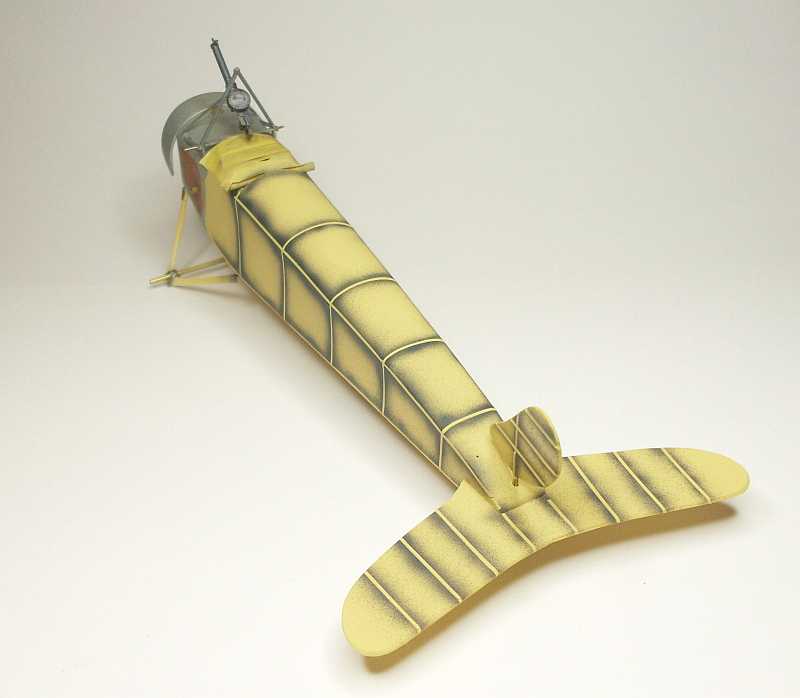
The wings supplied with the kit are not too bad, they are very thin though and the trailing edge is so thin that it is a little wavy. I inserted two 0.7mm drill bits into the brass tubes where the wing mounts meet. I drilled o.7mm holes into each wing where they correspond with the mounting tubes, I drilled about 3.0mm into each mount position. The wings easily slide onto the drill bits and because the drill bits are very strong there is no flex so the wings stay reasonably straight. The fuselage has been sprayed with Tamiya smoke, this has darkened the original yellow paint and brings it more in line with what it is supposed to look like, a bit like a mustard colour.
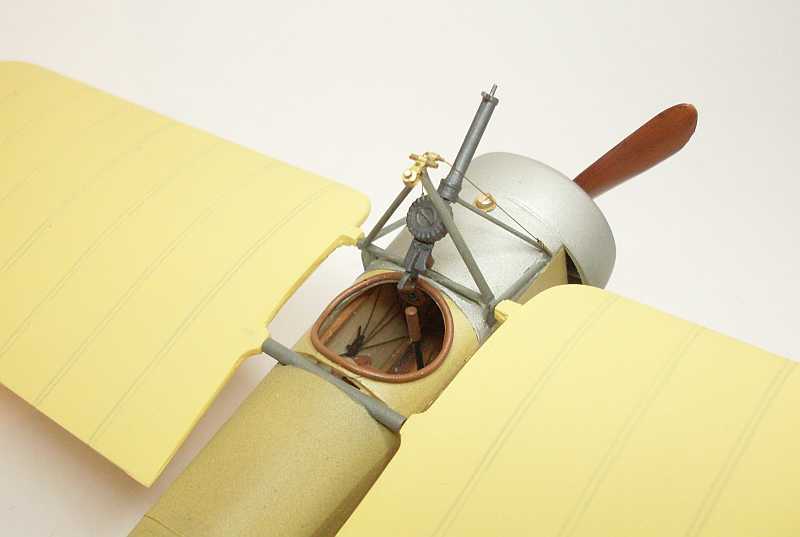
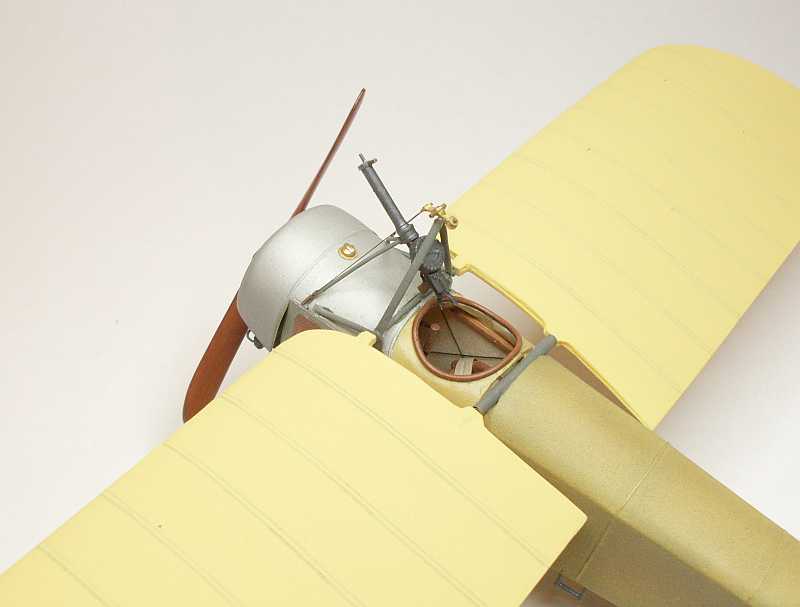
I made the rigging attachment bracket and fitted it to the top of the upper mast. The bracket is made from thin brass sheet cut in a thin strip, it was folded in half and two short lengths of brass tube sandwiched between the sheet, a 0.4mm hole was drilled through the sheet and also into the top of the mast, I fitted the bracket by inserting a short length of 0.4mm brass tube through the bracket and into the mast, CA holds it all together.
I made the decals to fit onto the rudder. I firstly cut out some circles of white decal paper for the inner section, I then printed the coloured section on my ink jet printer onto clear decal paper. I fixed the white circle onto the rudder first then applied the coloured circle over the white, it worked very well.
HANDY HINT for making your own decals.
Printing decals is very easy. I use my drawing program to produce the design and colour I am after, I then printed the decal onto either white or clear inkjet decal paper. Once printed the decals will have to be left in a dust free place for at least three hours to allow the ink to dry thoroughly. Once dry you will need to spray the decals with a clear lacquer, the ink jet is water soluble so they will need to be protected. The clear lacquer sprays extremely well and dries very fast. When cutting the decals from the sheet cut as close to the decal as possible.
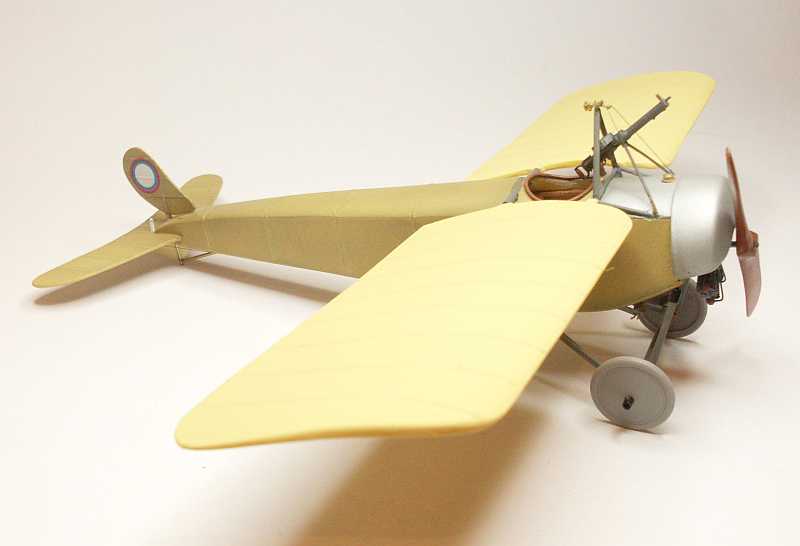
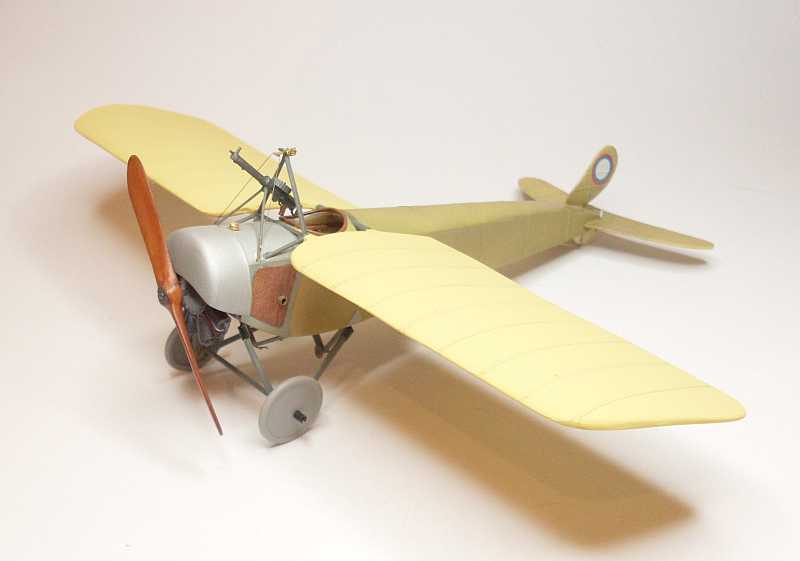
The wings have been painted with Humbrol No.74, they will be darkened with Tamiya smoke later. I am using some old wheels for the time being, while handling the model I don’t want to damage the spoke wheels. The propeller is the kit supplied propeller with a coat of oil paint and some satin clear, I will be using a Doug Craner hand made laminated wood propeller on the completed model
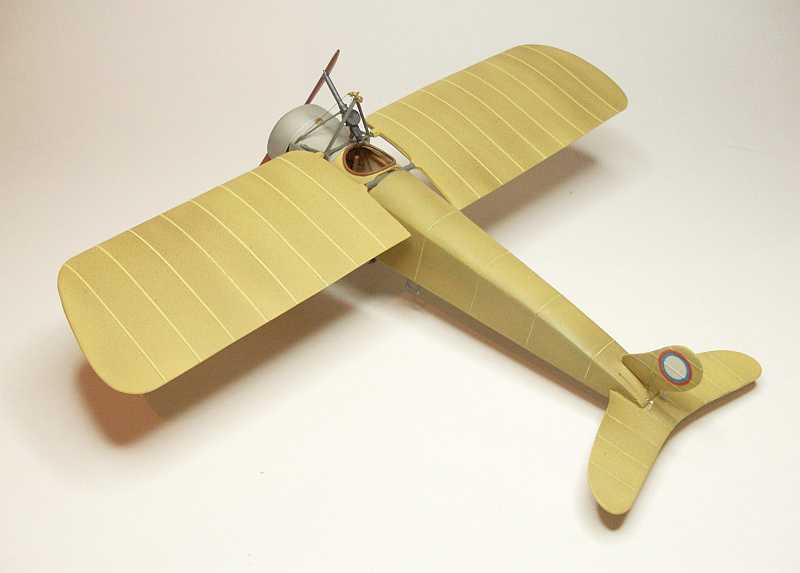
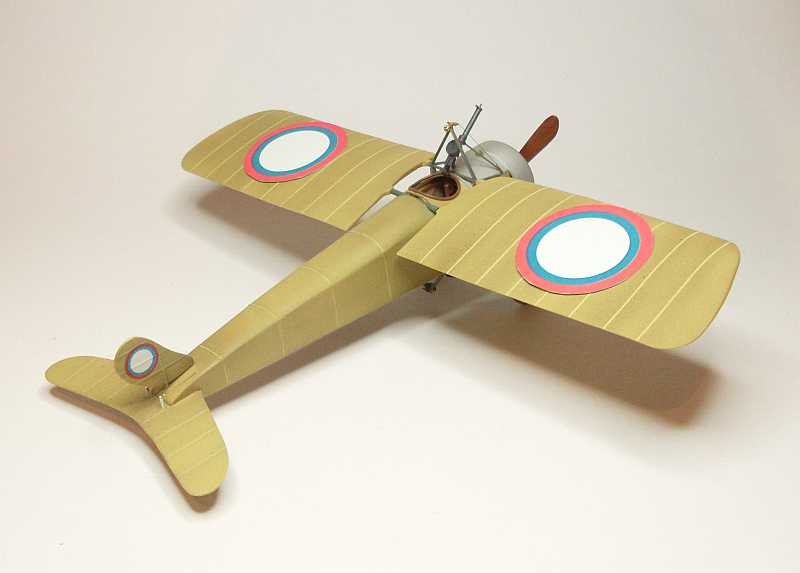
Í firstly masked the wing ribs with 0.5mm masking tape, then I sprayed the wings with Tamiya smoke, the patchy look is what I was trying to achieve, I want the aircraft to look a bit used. Once the paint was dry I removed the masking tape which reveals the ribs giving quite a good appearance.
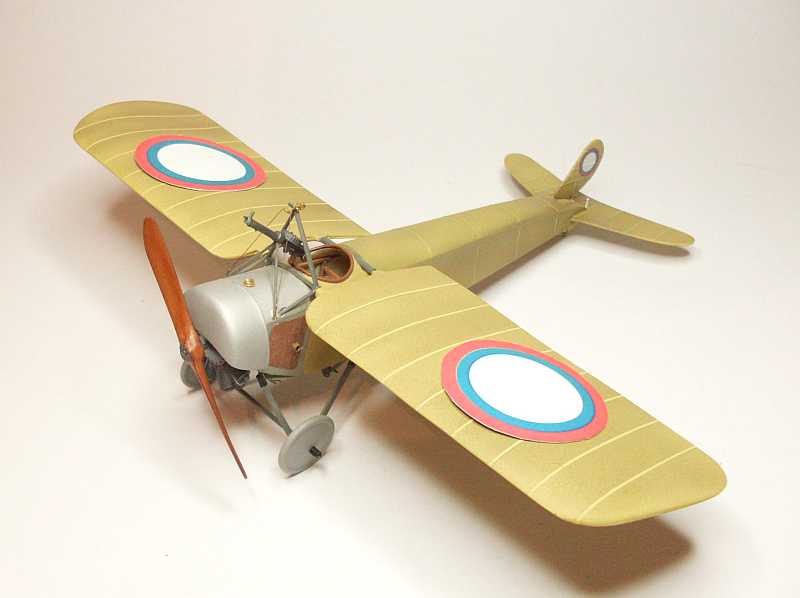
These pictures show the kit supplied decals which have been cut from the sheet and are just sitting on the wing to see what the plane will look like with decals. I will not be using the kit decals, they are of poor quality, are printed in dot format, and are out of register. I have made new decals using the same process as described above, they are a much better solid colour and are in register.
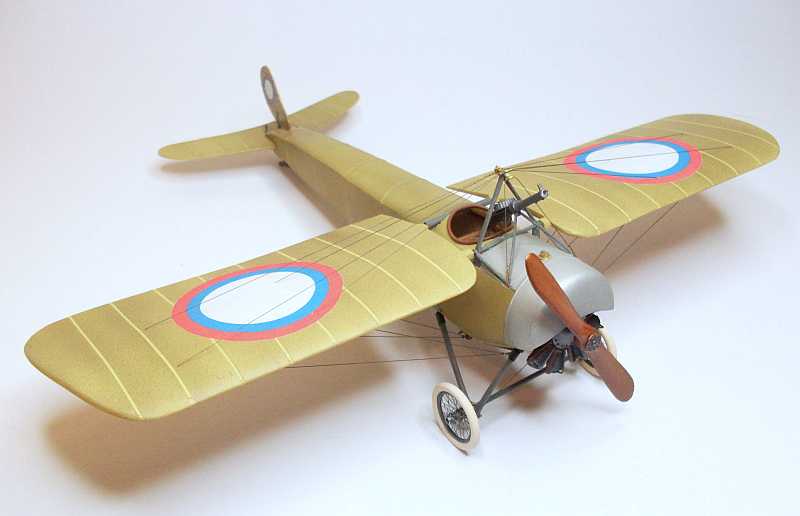
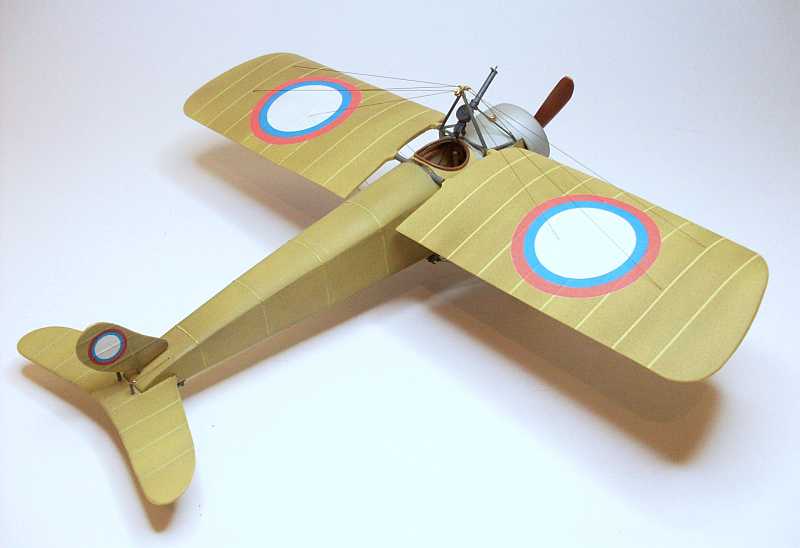
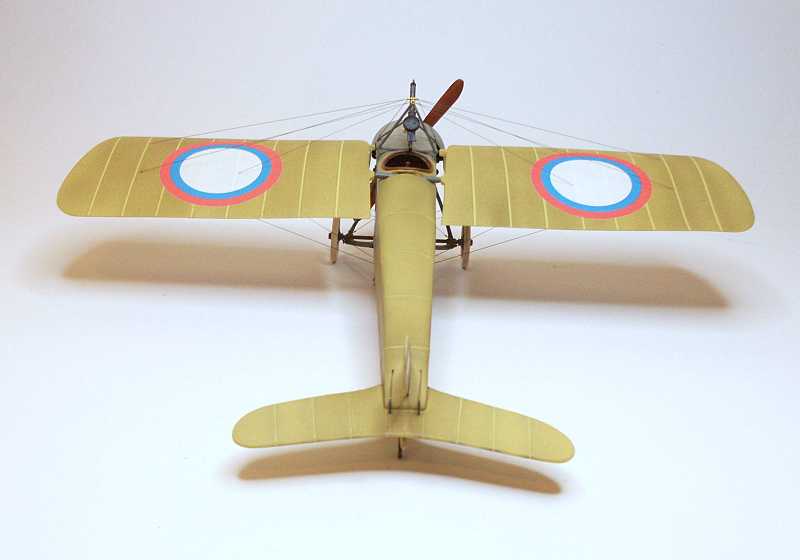
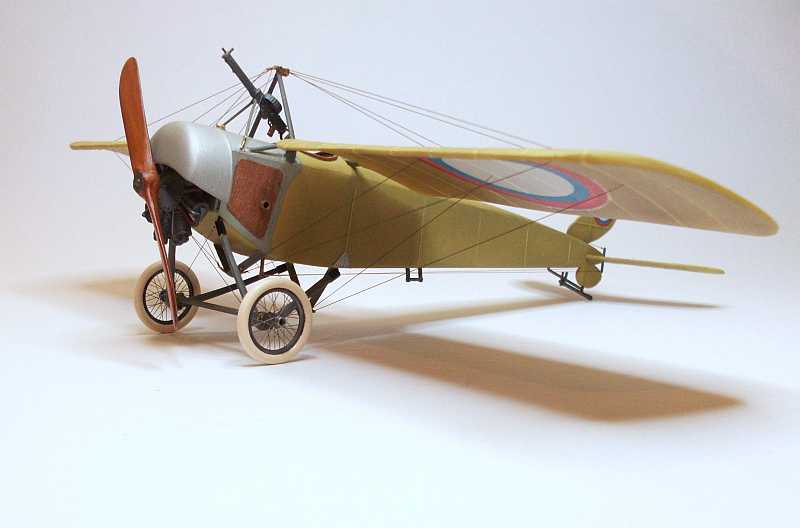
COMPLETED MODEL
I can quite honestly say that I did not enjoy building this kit but In the end it did build up to be a reasonable looking model. The kit itself in my opinion is way over priced, the quality of the castings is very poor and the fit of parts is appalling, a lot of scratch building was need to produce a model that resembles a Mosca MB bis. The decals supplied with the kit are unusable so I had to make my own decals and lastly, the instruction are as good as useless,
I would not recommend this kit to anyone except those who like a real challenge, this kit certainly is that but with some effort (a lot of effort) a nice looking model can result.

 Index
Index