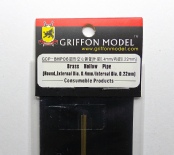
I use 0.4mm Griffon Models micro brass tube for the body of the spark plug. This tube has a 0.22 internal bore which is perfect for the 0.2mm drill bit ignition lead connectors. Griffon Models tube is available from
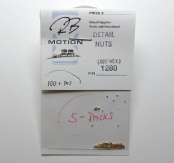
For the nut of the spark plug I use RB Motion brass nuts. The size shown here has a 0.4mm hole which is perfect for the 0.4mm brass tube.
Super Glue adheres to brass very well so there is no problem in holding everything together.
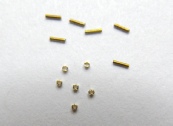
I cut the 0.4mm brass tube to 2.0mm lengths, exact dimensions for each tube is not critical but it gives a much better appearance if all tubes are the same length, run a 0.2mm drill bit through the cut tubes to clean out any burrs.
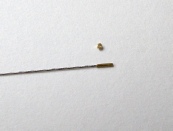
0.2mm worn out drill bits make excellent connection points for the ignition leads, they are very strong and won’t flex. I find it easier to insert the drill bit into the tube first, a small drop of CA will hold it firmly. The small brass nut is ready to be fitted.
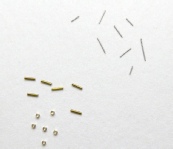
I break the 0.2mm drill bits into short lengths and insert each one into the brass tubes, they are glued into place. These will be trimmed to length once the spark plug has had the brass nut fitted and glued in place.
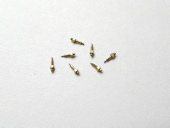
Slip each nut over the brass tube and CA in place, only a very small drop of CA is needed. Once the nut has dried snip the end off the 0.2mm drill bits so a small amount remains, a good pair of side cutters are needed for this as the drill bits are hard.
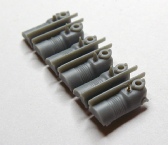
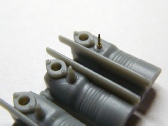
The new spark plug fitted to the cylinder block from a Wingnuts kit. It is clearly obvious that the brass spark plug looks much neater than the blobs of plastic which are supposed to represent spark plugs. Once all six plugs are fitted and painted they suit the engine beautifully. I usually leave the nut as natural brass, the body of the spark plug would be painted in a semi gloss white and the small steel ignition lead connectors would be a brass colour. Colours are you own personal preference.
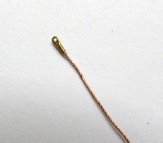
I make my ignition lead terminals from 0.4mm brass tube. I flatten on end and drill a 0.3mm hole through the flattened section, I then cut the tube to a shortish length and insert a length of electrical cable to represent the ignition lead, I use a small drop of CA to hold this into the terminal.
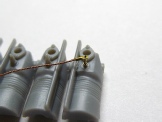
This shows the terminal and ignition lead sitting on the spark plug. Using your imagination you can quite easily see how this is going to look fitted to a completed engine and the spark plug painted.
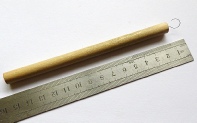
Making eyelets is one of the simplest task in the rigging process, hundreds of eyelets can be produced in a relatively short time with very little effort. The eyelet making tool is described here Eyelet Making Tool
This very simple to make eyelet making tool is a must if you wish to make your job easy and effortless. I have made thousands upon thousands of eyelets using this one brilliant tool.
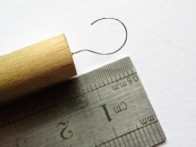
The wire hook used here is 0.3mm spring steel made from a straightened out coil spring. You can use whatever thickness wire you like but 0.3mm gives a good eye opening size for rigging
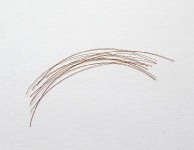
I use 0.13mm copper wire stripped from cables used for electronic equipment, these cables produced a variety of wire sizes and a short length of cable will produce a lot of wire. I cut the wire to a length of 50mm, this gives a good working size.
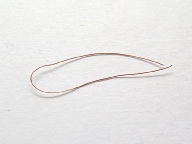
The first process in making your eyelet is to fold the wire in half, this will give you a loop for the eyelet making tool to connect to and gives you two tails for holding while the eyelet is being twisted.
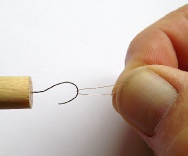
Hold the wire between you thumb and pointer finger. Place the eyelet making tool hook over the loop of the wire, pull back on the eyelet making tool to give a bit of tension, holding the wire between your fingers does not require a great deal of pressure.
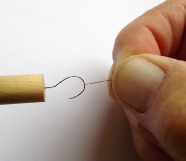
While holding back pressure on the tool spin the handle of the eyelet making tool between the thumb and pointer finger of the other hand, it doesn’t take a lot of spins to get a nice tight twist in the wire, don’t over tighten the wire as it could break.
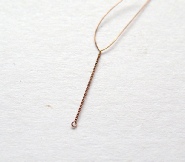
The result is illustrated here, a very tightly wound eyelet with a neat 0.3mm eye. The completed eyelet is quite strong and will take the tension required to hold the aircraft rigging tight. I have never has an eye pull out of shape when rigging my models.
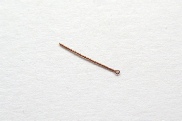
Trim the excess off the eyelet with a sharp scalpel blade, this will give a very clean cut. The length of the eyelet will be determined by its use, the next section shows this eyelet being used as a single ended turnbuckle.
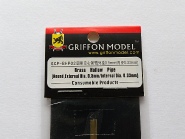
For making turnbuckles for my 1:32 scale biplanes I use Griffon Models 0.5mm micro brass tube, this size tube has an internal diameter of 0.33mm which makes it ideal for fitment of the twisted wire eyelets. Super glue adheres to clean brass very well.
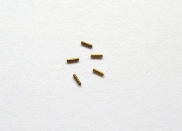
Using my tube cutting jig I cut the 0.5mm brass tube to a length of 2.25mm, after cutting the tube it is always a good idea to run a 0.3mm drill bit through the tube to remove any burrs that may be present.
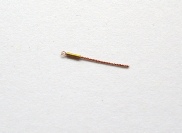
Simply slide the brass tube over the tail of the eyelet, a small drop of CA at the tail end of the tube will hold it very well. The length of the tail can be cut to suit your particular application, being soft copper wire it can be bent to any angle to suit your rigging runs. These turnbuckles are extremely easy to make and are very functional.