 Index
Index

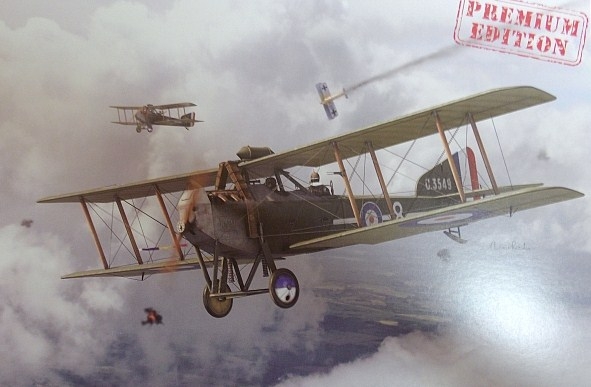
This is the newly released 1:48 scale Armstrong-


I have decided to start construction with the engine and for the purpose of this build I am using the injection moulded engine. The engine is very well detailed and has crisp detail, the first thing that needed doing was to separate the cylinders, I did this using a razor saw, it was quite a simple exercise, once the saw was cut through I used a piece of fine wet and dry paper to smooth out the cut. These pictures shows the first three cylinders separated.


I added the rocker arms to the top of each cylinder but to make them look more 3D I hollowed them out. To do this I firstly drilled a series of 0.3mm holes then filed them out with a fine jewellers file. I managed to do three rocker arms from each end, a little time consuming but well worth the effort. I also fitted the two magnetos, for the ignition lead connections I drilled 6 holes into each magneto, I used a 0.3mm tungsten carbide drill bit for this task. I added the plumbing that was supplied with the kit but there is a lot more work to do yet, next up will be the painting of the cylinders and crank cases. As with all of my engine builds I will be adding as much detail as possible.

1:48 scale
Injection moulded


I have added a bit of paint to the engine. The cylinders were sprayed with MRP copper paint, being a very thin paint I needed to do four coats to get a good coverage. The rocker arms and base of the cylinders are brush painted with Mr Metal Color Stainless, when dry I buffed the paint lightly with a soft brush. The crank cases are brush painted with Mr Metal Color Chrome Silver 211, this colour brushes on extremely well and again buffs to a nice shine.


I have nearly completed one side of the engine by using various sizes of wire to simulate plumbing. The throttle cables are done by using 0.12mm copper wire, once fitted in place they were painted using Mr Metal Color Dark Iron. The ignition leads were made by using 0.09mm copper wire, once in place they were painted with Humbrol Matt 94. I will now attempt to complete the opposite side of the engine.
The engine sitting on the instruction booklet showing you the added detail that is not included with the kit. It is a little time consuming adding all the little bits and pieces but I believe it is well worth the effort, the engine is only very small so keeping everything in scale can pose a few issues.
I have completed detailing the engine by adding the ignition leads to each cylinder and I also added more plumbing. I also added the exhaust which is the kit supplied plastic exhaust, the premium metal exhaust is good but I prefer to use plastic. As I said earlier I opted to build the plastic engine and not the premium resin engine, in my opinion the plastic engine is every bit as good and details very well. Here are a series of photos showing the completed engine.


I have started to assemble the fuselage bits and pieces so while at this stage I thought it a good idea to trial fit the engine. With all the extra plumbing I added there could have been interference with the engine bearers but luckily everything fitted extremely well. I am very pleased with the way the detailed engine looks in the frame.

I assembled the two ammo storage boxes from the supplied PE, a little fiddly but the end result is quite appealing. I have also started to gather all the parts necessary for the fuselage interior ready for painting. The two fuselage halves had ejector pin marks which required filling and sanding before painting


I have started to assemble the inside of the fuselage. I firstly painted the fuselage insides with MRP CDL paint as directed by the instructions. The wood bits have been painted using Humbrol enamels, I placed these parts into my heat box to accelerate the drying time. The machine gun was painted with Mr Metal Colour Stainless then lightly buffed, I will be leaving the ammo box beside the machine gun the PE colour. The fuselage frame rigging was done with 0.12mm Modelkasten elastic thread, small holes were drilled through the fuselage frames to accommodate the rigging and it is held in place with super glue. Because of the very tight tolerances all traces of paint have to be removed from any part that mates with the fuselage.


I trial fitted the top fuselage coaming and the engine to see if there was any interference of the two parts, both fitted extremely well. The two fuselage halves are also an excellent fit and should pose no issues when the final closing of the fuselage takes place.


I have completed the two fuselages halves by spraying them with a satin finish clear. Installing the machine gun ammo drums into the two boxes proved a little difficult, I had to removed a section from the side if the drums to allow them to slide into the ammo boxes, the cut section is unseen once the drum is inside the box. I used the kit supplied PE seat belt for the pilot seat, after tempering it was easy to bend into shape. The last photo shows the two fuselage sides assembled but not glued, the fit of these two sides is excellent, I did remove paint from any of the mating surfaces though. Once the clear coat has had 24 hours to dry I will close the fuselage up permanently, like most of these WW1 aircraft once the fuselage is closed little of the internal details are visible. So far this kit has gone together beautifully, the fit of parts is excellent and the instructions are extremely well done.


A trial fit of the bottom wings. The mounting lugs are excellent and provide a very positive and secure fit. The two fuselage halves are now joined, they went together extremely well with no fit issues what so ever, the top cover for the rear of the fuselage also went on very well, this kit has been perfectly engineered.

I painted the instrument panel as per the instruction book colour call-


I glued the instrument panel into the cockpit coaming then fitted the coaming onto the fuselage. I removed all traces of paint from the fuselage which made the glue adhere perfectly and made the fit of the coaming superb. I only needed to use two lengths of Tamiya tape the hold the coaming down while the glue dried, again the fit was superb.


I have fitted the rigging to the front of the fuselage frames. I used 0.12mm Modelkasten elastic thread for the rigging, a brilliant product. I drilled small holes through the fuselage frames then inserted a length of thread, I added a small drop of CA which holds the thread very firmly, I then threaded the other end of the rigging through another hole in the frame, I added a small weight to hold it taught then added another small drop of CA, any excess thread was cut off with a scalpel blade. I rigged both sides of the engine bay, the bottom and the firewall.
Once all the rigging was applied I painted them with Mr Metal Color Stainless, this paint can be buffed to a sheen if required.


The engine has now been fitted to the engine bearers, I used CA to hold the engine in place. I have also started to fit the PE engine covers, all traces of paint have to be removed from any surface where the covers are to be glued.


I formed the nose section from the kit supplied PE part and to date this one task has proven to be the most difficult and time consuming of the build so far. I annealed the metal first but the metal is still quite stiff and difficult to bend, there are a series of small tabs on the sides which are supposed to be glued to the face but the tabs break off easily. I reinforced the internal seam by gluing on lead wire, this not only adds a lot of strength but still allows a certain amount of flexibility. Trial fitting during the different stages of bending and gluing ensures that the nose section is conforming to the correct shape. This is not a job for those who have little or no experience with PE. After two days of work I finally completed the nose, it fits quite well and is very strong and should paint up okay.


The side panels are now fitted as is the nose section, everything appears to be fitting quite well. The next job is to fold and fit the top engine cover, this has to match up with the nose and the two side panels. I also fitted the two AW signs on either side panel.


The undercarriage has now been fitted, it was quite an easy assembly to fit to the fuselage and once the glue has dried it becomes quite strong. I also fitted the fore and aft cabane struts, these also fitted very easily.


I sprayed the undercarriage and the cabane struts using MRP PC 10 paint, it is really good paint and sprays beautifully. I had to do a lot of masking to perform the spraying. I also sprayed the radiators and fitted them in position.
Just a trial fit of the propeller, this is the kit supplied propeller and is quite good.


I have sprayed the bottom of the wings, fuselage and tail using Gunze Off White acrylic paint. This colour is fairly close to the look of Clear Doped Linen and being an acrylic paint it was dry within two hours. I will need to do a lot of masking now so I can paint the PC10 and the wrap around on the wings and tail surfaces.


I have sprayed the top of the model by using my own interpretation of late PC10.
I started with Gunze acrylic H423 RLM83 Dark green then added small quantities of
Gunze acrylic H421 RLM81 Brown Violet until the desired colour was reached. Ironically
this colour ended up being nearly identical to MRP-


I have started to assemble the machine gun mount for the rear cockpit, fitting the two PE parts proved a little difficult but they fell into place eventually, the machine gun is only sitting in position for photo purposes. I also fitted and painted the tail skid, it is not overly strong but strong enough to handle the weight of the model.

I fitted the windscreen and the Aldis sight in front of the cockpit, I used PVA white glue to fix the windscreen in position. The machine gun is also completed, I used 0.12mm Modelkasten elastic thread for the bungee cords, this is an excellent product and is easy to work with.


I fitted the bomb racks to the underside of the bottom wings, bombs will be fitted at a later date. The decals on both sides of the fuselage, the fin and rudder and under the bottom wings have now been fitted. I will allow the decals to dry a full 24 hours before I spray the entire model with a coat of satin clear. The fin and rudder (one piece) fitted the fuselage perfectly and sat perfectly vertical.

I have painted and fitted the eight bombs to the bomb racks fitted to the bottom wings, the bombs are painted with Humbrol Full Gloss No.7 Light Buff enamel. I accelerated the drying time of the enamel paint by placing all the bombs in my heat box once they were painted. Fitting the bombs to the racks was quite a simple job.


I painted and fitted the wheels, the wheels were first painted white then the red decals applied, the back of the wheels are painted PC10, the tyres are painted with Gunze black/gray. I have also fitted the struts and the rigging brackets, these all went on very easily, I did not mount the Pe rigging attachments to the side of the fuselage instead I drill 0.3mm holes for the rigging. The propeller has been painted with Gunze Radome then oil paints.
The top wing is now fitted to the struts, it went on very easy and posed no issues at all, next comes the rigging but I will give the top wing glue time to cure first.
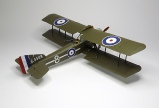
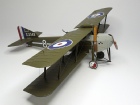
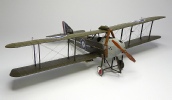
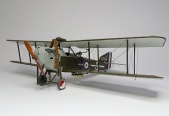
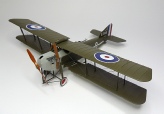
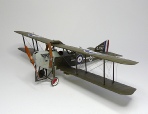
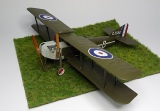
THE RIGGING IS QUITE COMPLEX BUT EASILY FITTED, THE 0.1MM MONOFILAMENT ADDS A LOT OF STRENGTH TO THE MODEL. I APPLIED THE DECALS TO THE TWO RADIATORS AND THE TWO DECALS TO THE PROPELLER, ALSO THE THIN WHITE STRIPE TO BOTH SIDES OF THE FIN AND RUDDER. I USED THE KIT SUPPLIED CONTROL HORNS FOR THE AILERONS BUT NEEDED TO DRILL THE CONTROL LINE HOLE OUT TO 0.35MM. THE FOLLOWING SERIES OF PHOTOS SHOW THE COMPLETED MODEL, IT IS A BRILLIANT KIT WHICH IS VERY EASY TO BUILD, THERE IS A LOT OF PE BUT MOST OF IT IS USED DURING THE BUILD. ANYONE WHO LIKES TO BUILD 1:48 SCALE WW1 AIRCRAFT MODELS I HIGHLY RECOMMEND THIS KIT, CSM HAVE PRODUCED A STATE OF THE ART KIT WHICH BUILDS INTO A SUPERB MODEL.