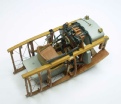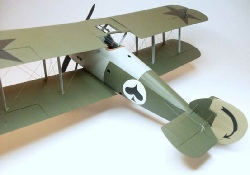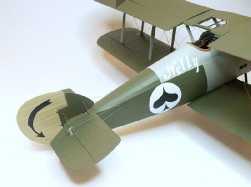


The ‘wood’ parts have been painted, they were first base coated with Gunze yellow then oil paint applied. The darker wood is Burnt Umbers while the lighter colour is a mix of Raw Sienna and Yellow Ochre. The inside of the fuselage sides are painted with Gunze Hemp, the timber look is a combination of Raw Umber, Yellow Ochre and Burnt Umber oil paints. I drilled out the back of the seat to give the open crossed weave look, I did this with a 0.5mm drill bit then cleaned each hole with a broaching tool. The wicker cane is painted using Gunze Middlestone while the seat cushion and the padding is done with Humbrol Wine Red, the seat plus all the other parts still need a coat of satin clear.


I changed the colour of the seat to a leather colour, I think it looks better. I also fitted and painted the throttle quadrant and all the associated plumbing and linkages, these are all supplied with the kit. I removed the Tacho drive and replaced it with a 0.5mm x 20mm spring, it is a very fine spring and once fitted to the Tacho it looks more like the proper flexible drive shaft as per the original photos.
The decals supplied by Wingnuts are excellent, the are very detailed and adhere extremely well. I painted the areas to have decals applied with futures firsts, once this was dry I painted the area with Mr Mark Softer then applied the decals, they had no problems sticking to the surface but still allowed me plenty of time to make any fine adjustments.


These two photos show a trial fit of the cockpit parts, everything goes together very well with all locating pins aligning perfectly with the appropriate holes.
The cockpit is now fully assembled. It is a bit of a juggling act to get all the components in their correct position for gluing. The rear fuel tank and floor boards, the control column, the rudder bar, instrument panel and forward fuel tank all have to be held as the two sides of the fuselage frame are brought together, whilst doing this I had to make sure all the rigging and control wires dig not get mixed up with the assembly. It eventually went together very well and once the glue was set I completed the rigging. The entire cockpit was sprayed with Humbrol Satin clear. I still need to add the seat belt before I go much further.


The machine guns were sprayed with Mr Metal Color Dark Iron then lightly buffed, they fitted into their respective locations very easy. I also added the seat belt, I prefer to use the HGW fabric seat belts, they are a much better seat belt when compared to the kit supplied PE parts, a lot easier to work with as well and don’t require painting.


The tail skid assembly is now fitted and painted, I did the rigging before fitting the tail skid. The rigging is 0.12mm mono painted with Mr Metal Color Stainless then buffed. All the small metal brackets around the back end were painted with black printer ink then clear coated. I coloured the fuselage stringers using a Faber Castell PITT artist pen, it is marked with an S. Once dry I sprayed over the marker with a clear satin. I also painted the front section of the fuselage using Humrol Aluminium No.56 which is a metallic paint. The fabric interior has been done with Gunze Hemp, it is a little darker then the usual CDL but it gives the impression of the outside being painted a darker colour, everything has had a coat of Humbrol Satin clear.


The fuselage has now been buttoned up and the cockpit coaming added. The cockpit interior fitted extremely well within the two fuselage sides, it was a perfect fit with no sanding or filing needed to make it fit, The fuselage sides went together really well with no gaps and perfect alignment, I doubt if I will need to use any filler. The cockpit coaming also went on very well, it mates exactly correct with the fuselage sides and has a good bonding surface. The machine guns and fuel tank filler caps line up exactly where they are supposed to be in relation to the coaming.


The dark green has been painted using Gunze Brown Violet, it is a very close colour match to the colour scheme in the instruction book. The grey colour at the front of the aircraft is painted using Gunze Barley Grey. The engine cowl is only sitting in position just to do a trial fit, like the rest of this kit so far it fits perfectly. Overall finish once the decals are applied will be a satin clear coat.

I sprayed the ribs first with an off white Gunze paint, once dry I then covered each rib with 1.25mm masking tape. I sprayed the entire surface with Gunze Light Brown and allowed it to dry. I used Gunze Chocolate Brown and sprayed over each rib, the over spray went each side of the ribs giving the shade effect. Once it was dry I removed the tape then sprayed the entire surface again with the Light Brown toning down the Chocolate plus adding the wing colour to the ribs, very light mist sprays are needed for this process checking after each application of paint, keep doing this until the desired effect is reached, I only wanted a very subtle shading.


The tail plane, fin and rudder are now fitted. I am not happy with the gap between the fin and rudder as it is too large, so I will remove the rudder and do some adjustments. The decals on the fuselage and rudder applied very well over a coat of Humbrol gloss varnish, I did not use any decal set solution just plain water. The star decals on the wings were a little tricky to fit, they are very thin and had a tendency to crease easily, they were easy enough to position but they did grab the surface fairly quickly, I had to work quick to get them in the correct position before they adhered permanently. I patted them down with a soft paper towel then applied heat from a hair dryer. The bottom wing fitted perfectly and is now glued in position, the entire model has been sprayed with a coat of Humbrol clear, a 50/50 mix of clear satin and clear matt. The scheme I have used is scheme A in the instruction book, 1st Soviet Fighter Aviaotryad, 1920 (5 victories). These are quite plain markings but very attractive.


The engine supplied with the kit is absolutely beautiful, very finely detailed and all parts fit extremely well. The spark plugs are good enough as they are so I didn’t replace them. I used 0.07mm plated copper wire for the ignition leads, CA holds them in place very well. I painted the engine as per the instructions, Humbrol 27003 Steel and when dry I buffed it to a high shine.
The engine is now fitted to the airframe. A trial fit of the engine cowl revealed no interference so once painted it will fit exactly right. The engine locating pin is a very solid mounting to the firewall and once the glue was set it forms a very good rigid assembly. I touched up the spark plugs with a dab of off white and brass paint, the ignition leads are left natural plated colour.


The engine cowl has been painted with Humbrol 27001 Aluminium, it is now fitted to the aircraft and fitted very well. As with most WW1 rotary engine aircraft the cowl hides most of the engine detail, this is a shame as the engine is very well detailed. All the struts have been painted and are sitting in position for a trial fit, the locating pins are very positive and hold the struts extremely well, especially the cabane struts. The metal brackets on the struts are not the usual black colour, these are over sprayed with the same grey colour as the struts. I will add all the eyelets to the wings before fixing the struts permanently, I also need to paint the pitot tubes and plumbing before fitting the struts. The struts are moulded with very nice little eyes for the stagger wire connections, this makes life a lot easier for the modeler.


The top wing is now fitted. The struts located perfectly into the holes in both wings, Wingnuts have moulded different shaped pins for the bottom wing so mixing up the struts is not possible, this is a great innovation. Once the struts were glued into the bottom wing I placed the upturned top wing on my bench then placed the upside down model onto the top wing, all the struts aligned perfectly and all it took was to simply glue them to the top wing, wing stagger and dihedral is correct. I glued small eyelets into the underside of the top wing for the rigging, for the bottom wing I have made small brass connectors. I used a short length of 0.4mm brass tube, on one end I glued a small brass nut then into the tube I glued a length of mono for the rigging. I drilled 0.4mm holes in the bottom wing at the correct angle to take the brass tubes, rigging has now commenced with the cabane rigging already completed.


The wing rigging is now completed. I used 0.12mm monofilament, as each line was fitted
they were painted with Mr Metal Color Stainless then lightly buffed with a soft brush,
this gives a very nice metallic sheen. All the pre-


All the rigging is now fitted, I still need to paint some of the rigging lines but I am waiting for fresh supplies of MR Metal Color Stainless. The Aldis sight has been fitted, it was a bit tricky getting it in position as it passes through the windscreen, there is not a lot of space to work between the top wing and the fuselage. The propeller I used is a hand made laminated wood propeller by Doug Craner, I needed to show the bare laminated timber near the hub, the front of the propeller was painted grey while the back of the propeller is black. I didn’t want to spray black onto the propeller for fear that some paint would get onto the front, so I used a black marking pen, this allowed me to get a nice sharp edge right around the edge of the propeller, once dry the propeller was sprayed with a coat of satin clear. The wheels are also painted and fitted, I used five minute epoxy to fasten the wheels to the axles. Once I finish painting the remainder of the rigging wires the model will be completed.
This model has now been completed, it was an absolute joy to build and I would highly recommend this kit to any modeler with moderate skills. The kit assembles very easily and does not possess any vices what so ever, the only part of construction which could cause a few difficulties is fitting the Aldis sight, but with a little patience it does mount quite easily if care is exercised.


 Index
Index